Positives
- Really Comfortable
- Minimal Sand Gets Tracked In
- Super Fast Set Up
- Warmer Than Normal Tents
Negatives
- Smaller than Ground Tents
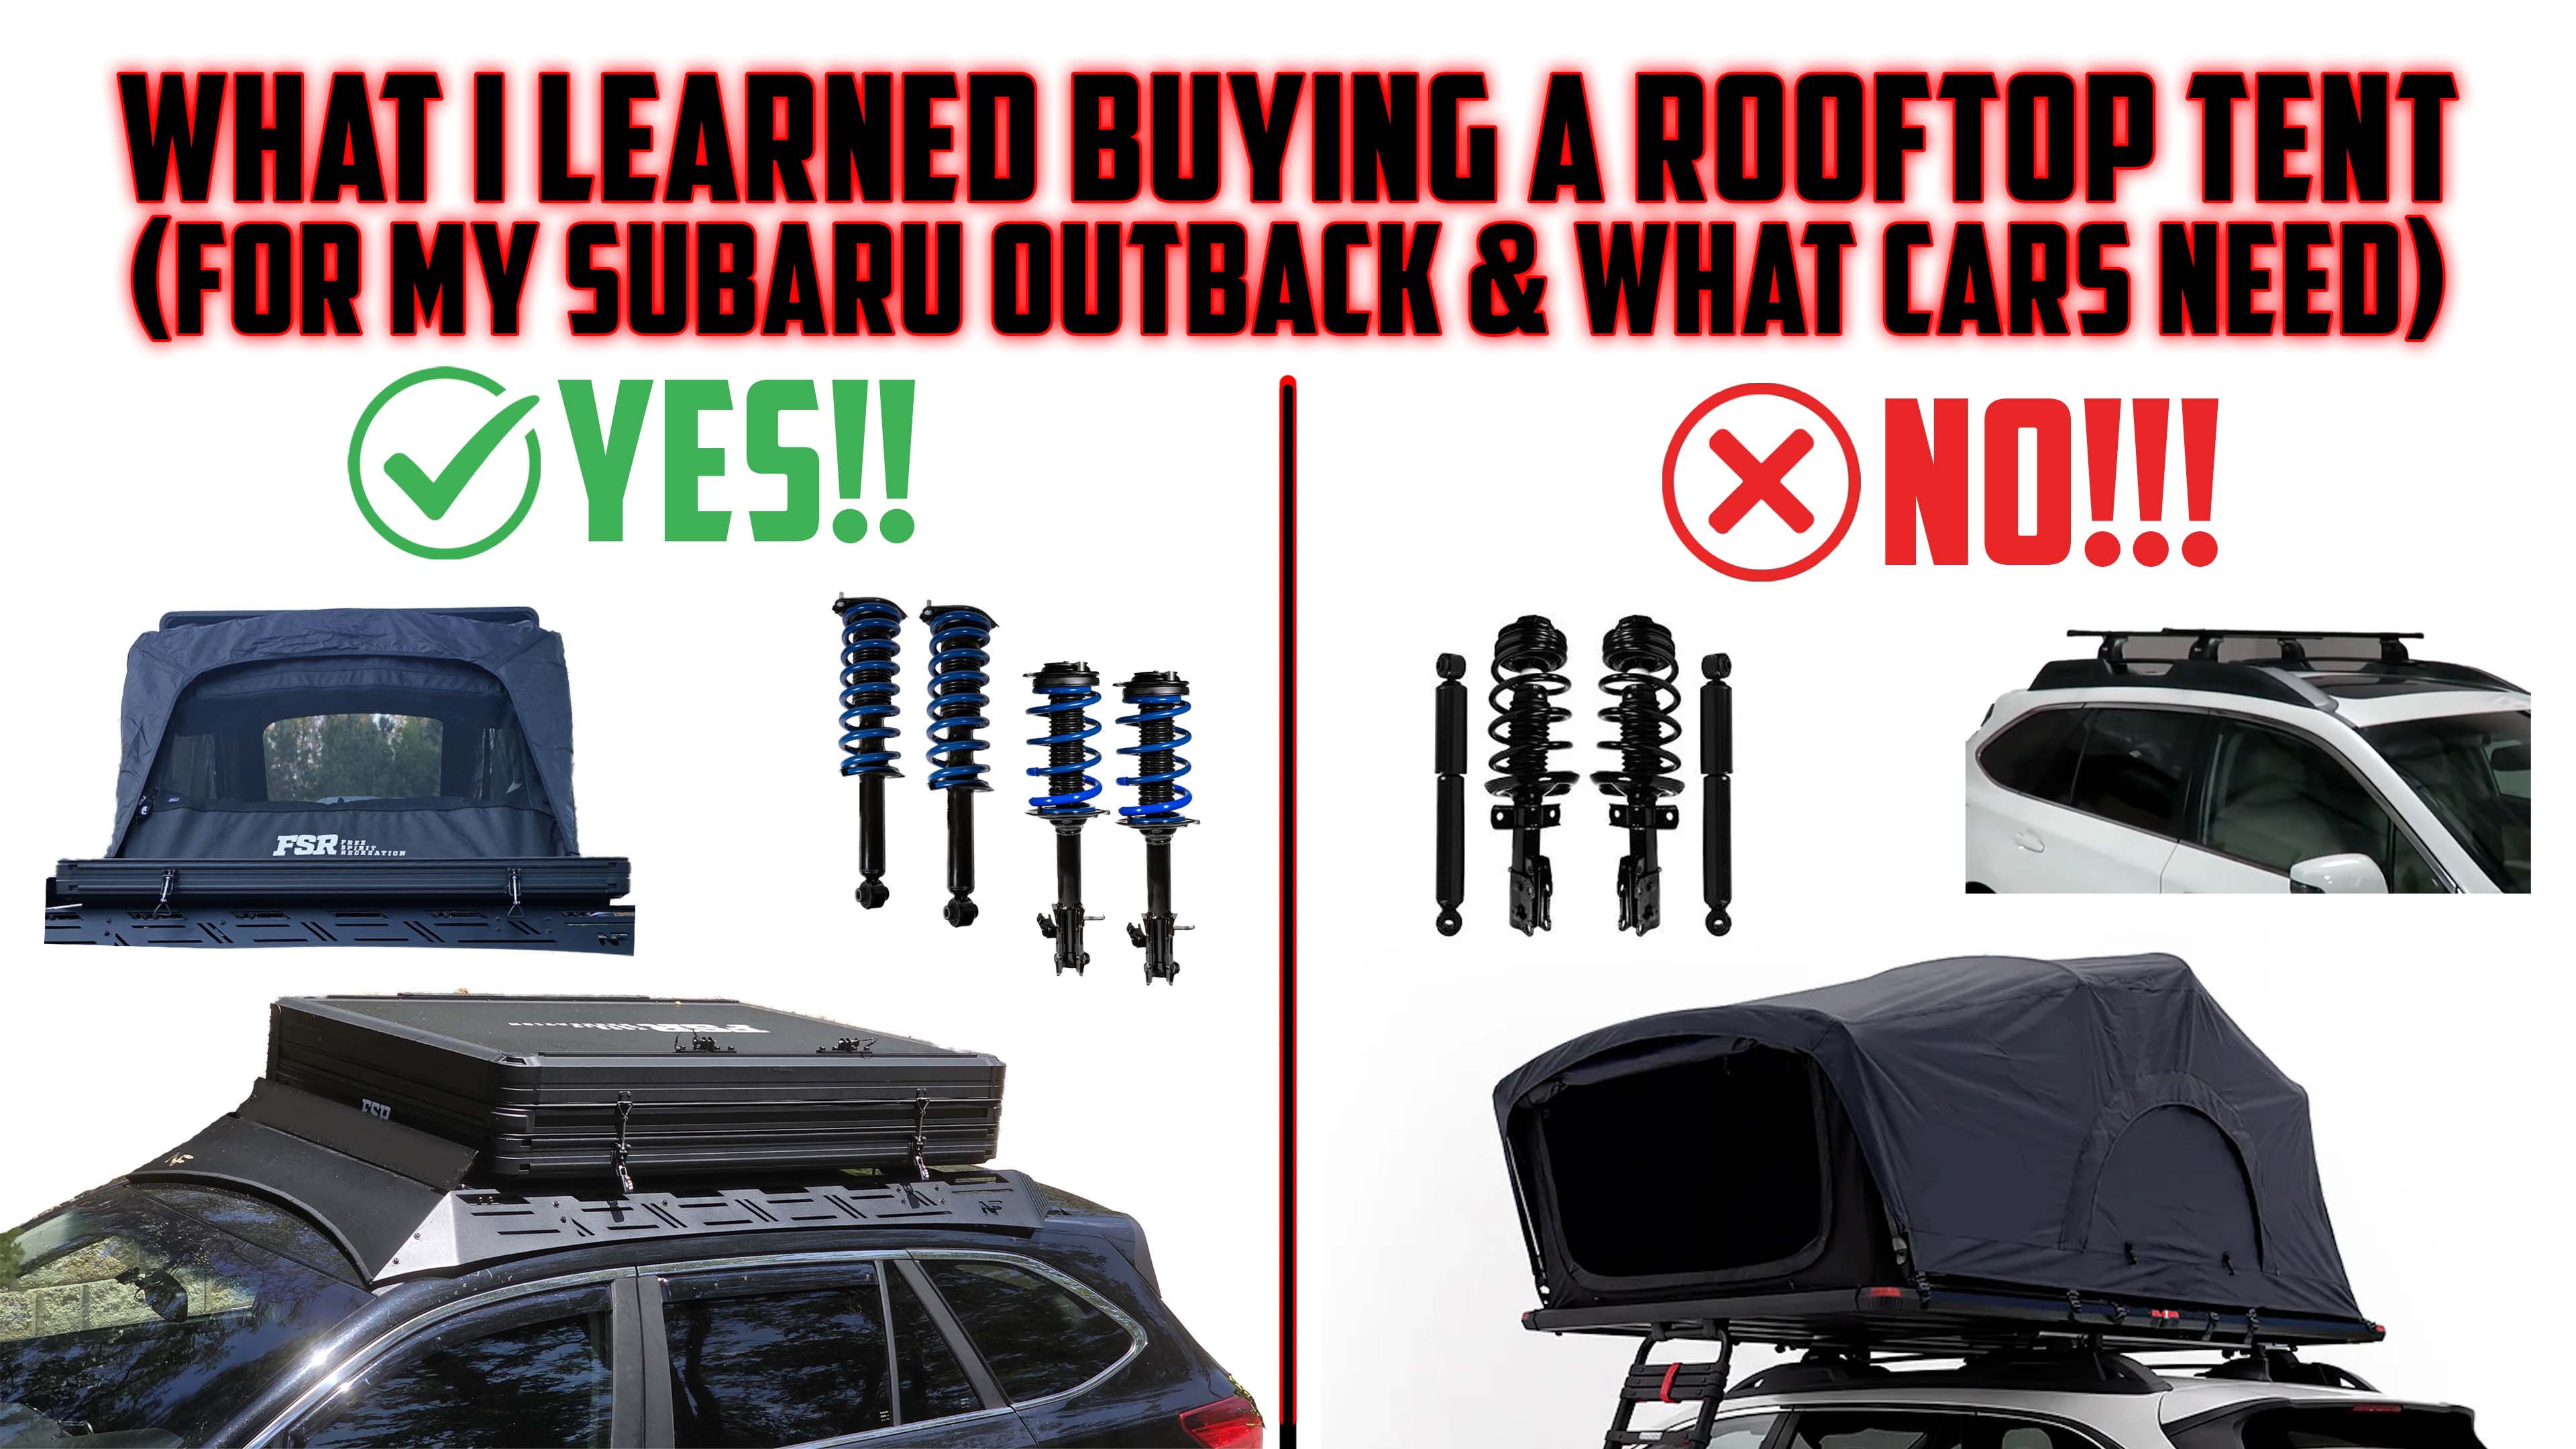
- Really Affects Your Cars Handling
- You Need New Shocks
- You Need A New Roof Rack
- Hard To Install
- Not for Everyone
Summary
Welcome to The Good Ride and a Rooftop Tents Buying Guide For Cars. AKA, everything I wish I knew before buying a Rooftop Tent. This is about my Subaru Outback, but it's going to relate to most small- to mid-size cars. I rarely see any detailed videos or articles about rooftop tents for small- to mid-sized cars.Where To Buy
No obligation, but these links support the site.
| Manufactured in |
Where To Buy
No obligation, but these links support the site.
What You Need To Know Before Buying A Rooftop Tent For A Subaru Outback Or Other Cars Review by The Good Ride
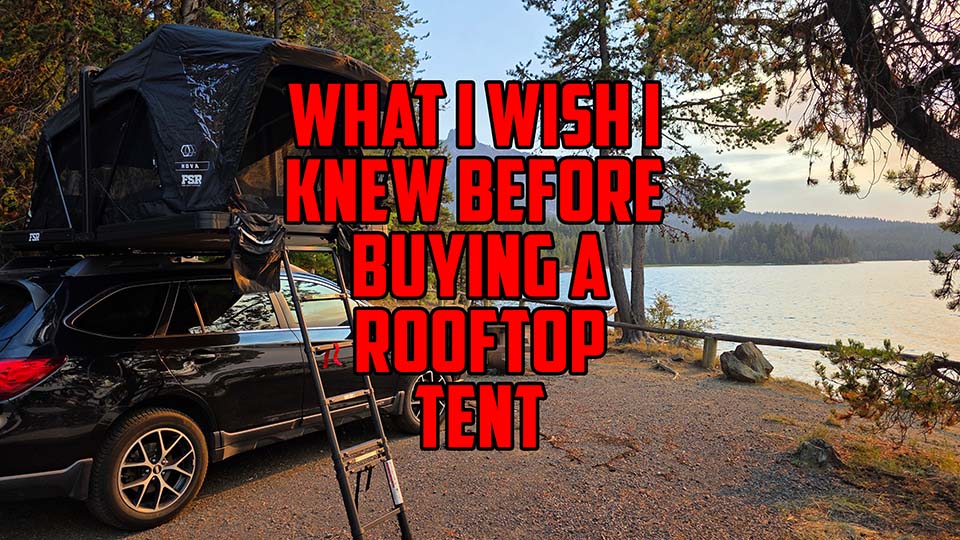
Introduction
Welcome to The Good Ride and A Small Car Rooftop Tents Buying Guide. AKA, everything I wish I knew before buying a Rooftop Tent. This is about my Subaru Outback, but it’s going to relate to most small- to mid-size cars. I rarely see any detailed videos or articles about rooftop tents for small- to mid-sized cars.
About Me and Why I Created A Rooftop Tent Buying Guide For Cars
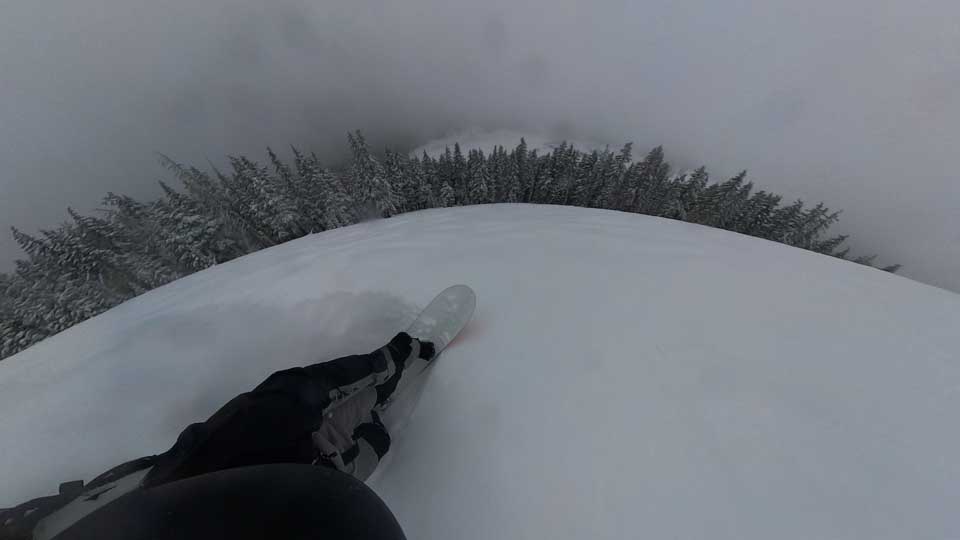
If you don’t know about me, I’ve been reviewing snowboards for almost 20 years. Snowboarding is my life and passion.
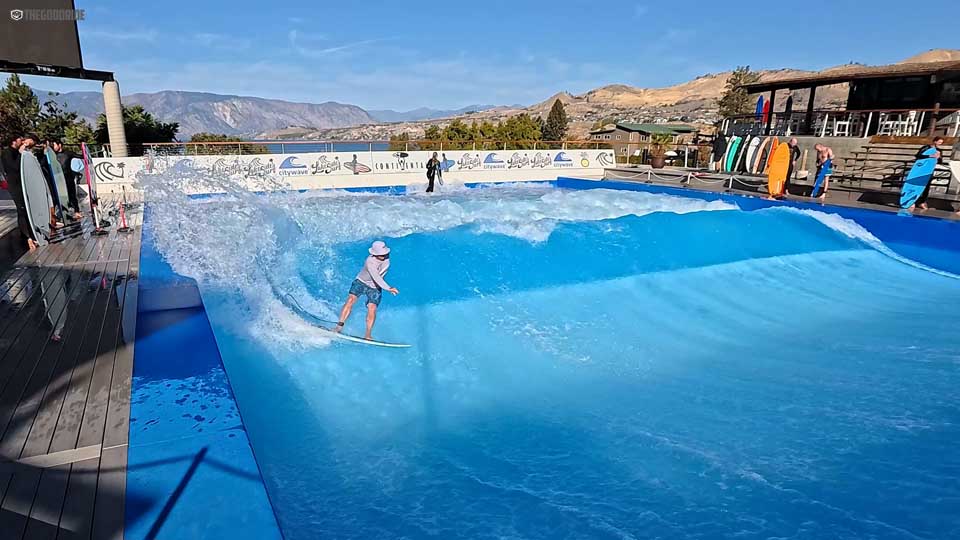
I’m also a lifelong surfer, and in the summer I love to snowboard at Mount Hood, surf in the ocean, and surf weird waves around the U.S. I often camp when I do.
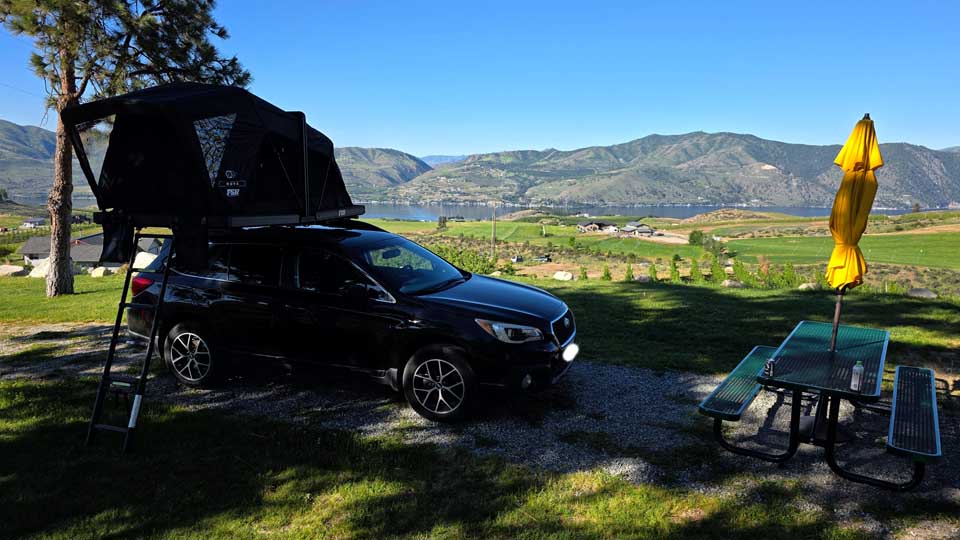
I also love camping for the sake of camping—checking out a dark sky, hanging out with my 11-year-old son, and occasionally getting my daughter and wife in on it as well.
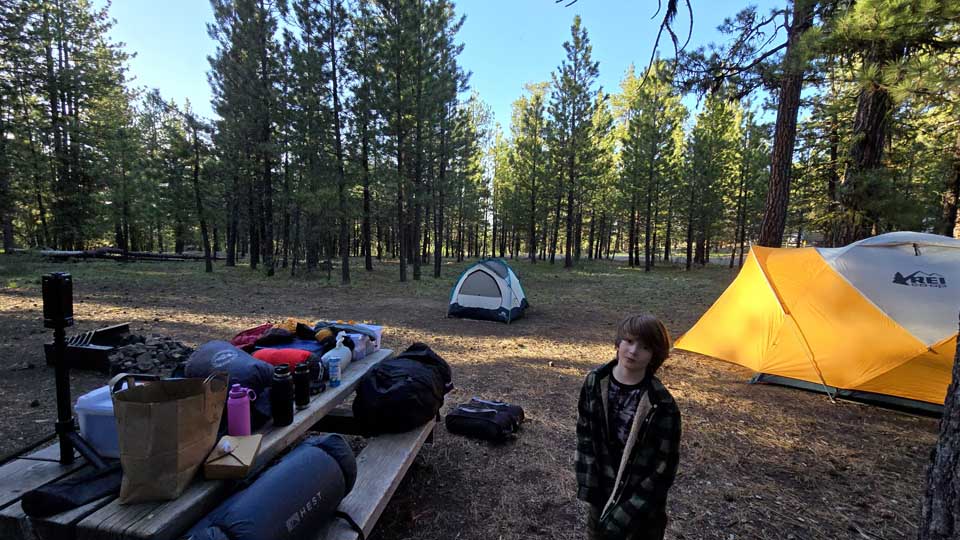
I started out using ground tents, but I got tired of the setup.
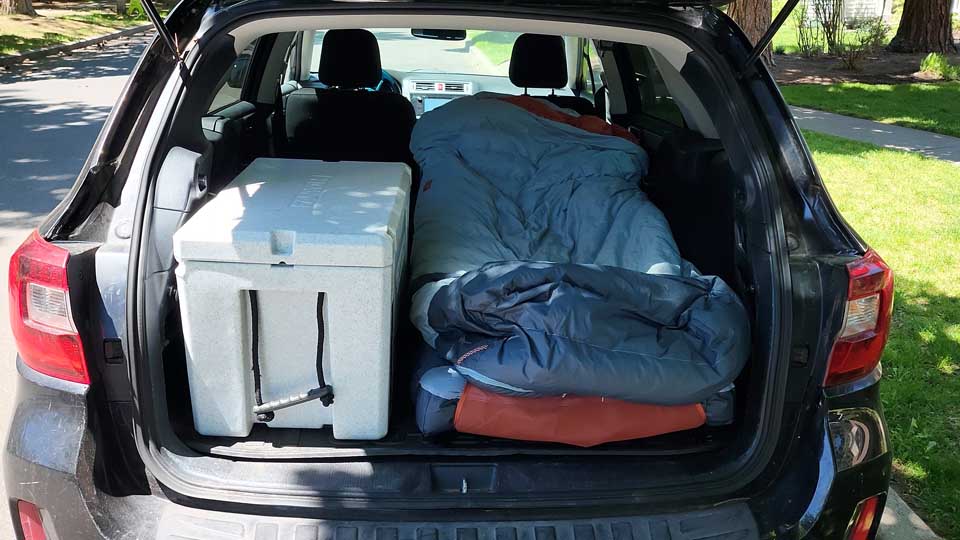
Then I looked into camping inside my car, and eventually that led me to getting a rooftop tent.
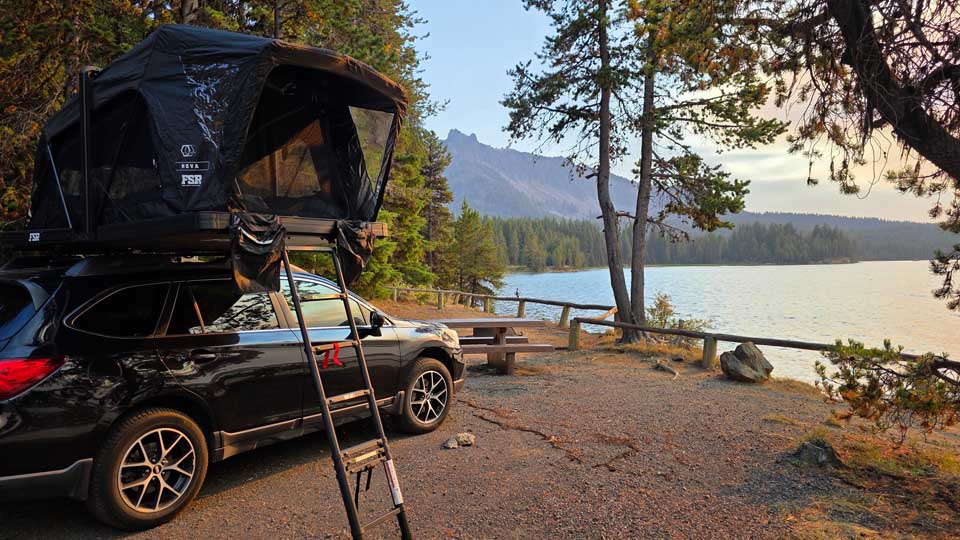
Now I love it, but this isn’t for everybody. Rooftop tents have a lot of limitations and a lot of expenses, especially for small to mid-size cars. I couldn’t find many reviews talking about those realities, so I wanted to take my life’s series of mistakes and put them on camera in the hopes that it helps anyone considering a rooftop tent for a smaller vehicle.
A Short Summary
A rooftop tent isn’t as expensive as buying a camper van, but it’s much more expensive than buying a traditional tent. You have to know you love camping and that you want an easier way to do it more often.
Positives
These are the biggest advantages for me.
- Convenience – Knowing you have less to pack and such an easy setup, it makes you want to go camping.
- Comfort – It’s so much better than 95% of regular tent setups
- Being off the ground gives you much better views
- I personally enjoy projects like this.
Negatives
The biggest drawbacks, especially for smaller cars like my 2015 Subaru Outback, are easy to overlook. If you’re thinking about buying one, these are the things I’d seriously consider first.
- You’ll likely need better suspension ($1,000-$2,000)
- You’ll need a new roof rack ($300-$1,900)
- There are lots of other things you have to buy that quickly add to the overall cost, like Wind Fairings and bedding specific to your RTT.
- Rooftop tents are also several times more expensive than a high-end ground tent($500 vs. $1,000-$4,000)
- They noticeably affect your vehicle’s handling
- RTTs are surprisingly difficult to take on and off.
Ethics Statement
I was not paid to write this Rooftop Tent Buying Guide, and it reflects an honest, objective perspective with no brand oversight. If this article helped, we’d appreciate it if you support objective content by:
- Buying through our Affiliate Links, we get paid a small commission if you do. Please make sure we are the last click and don’t use a coupon or discount provider. They take our commission if you do.
- Donate to https://venmo.com/TheGoodRide (@TheGoodRide) or https://paypal.me/thegoodride
- Follow Us: https://www.instagram.com/thegoodride
- Like & Subscribe on YouTube https://www.youtube.com/@thegoodridesnow
Your Suspension Is Critical
Most smaller vehicles aren’t like the trucks or large off-road SUVs you often see carrying rooftop tents. They simply don’t come with suspension that’s designed to handle that much weight sitting on the roof. So making sure you have the right suspension is just as important as getting a good roof rack to hold the tent. If you don’t have the right suspension,
IT WILL RUIN YOUR DRIVING EXPERIENCE
I rarely use “All Caps” so don’t take it lightly.
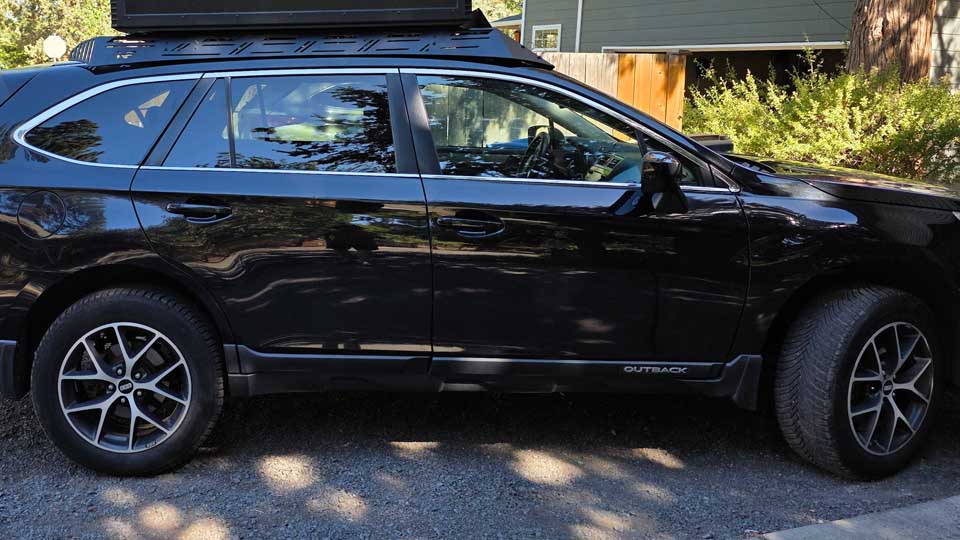
Most Cars Have Bad Suspension
For example, my 2015 Outback—and most Outbacks outside of the Wilderness models—doesn’t have great factory shocks. They generally don’t last much beyond 50,000 miles, and honestly they weren’t exceptional when they were new.
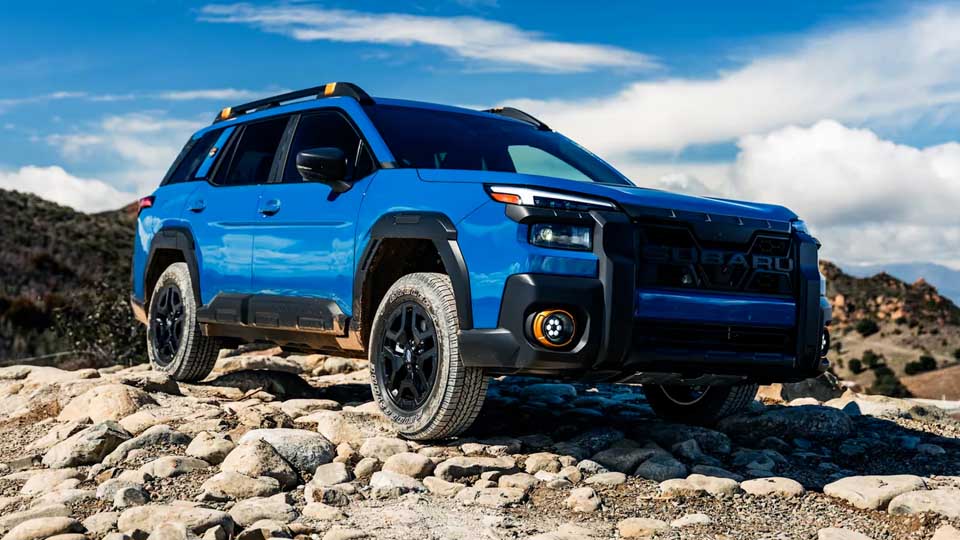
A rooftop tent doesn’t affect your vehicle the same way adding another passenger does. Because the weight is sitting high above the vehicle, it dramatically changes how your car corners and turns in general. Even with an excellent roof rack, your vehicle still won’t handle normally.
If you’re going to do this right, I think suspension should be one of the first upgrades you consider. You probably need it anyway. My Outback already had pretty high mileage, and I didn’t realize how worn the factory shocks had become until I replaced them.
RalliTek & Bilstein B4
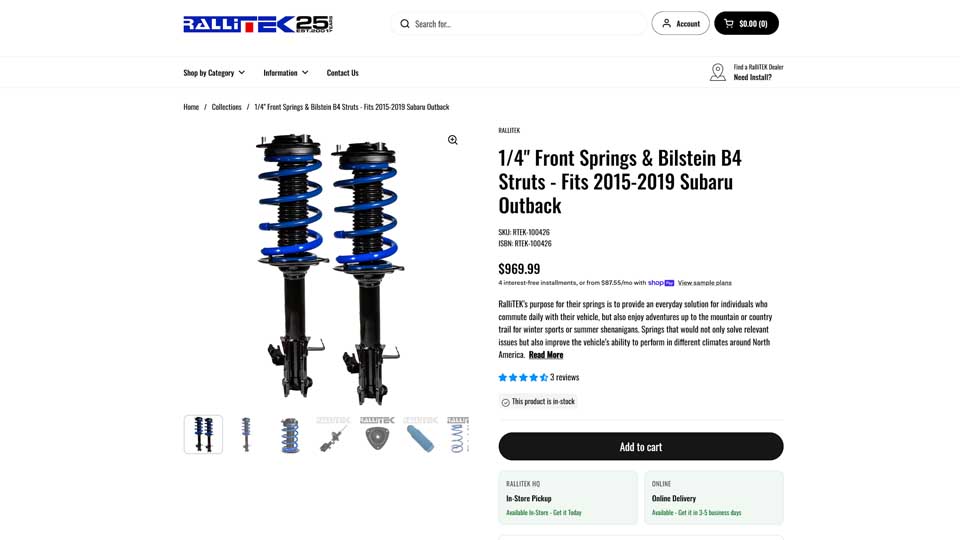
I went with Bilstein B4 shocks paired with RalliTEK springs. They’re very similar to the factory ride when the car is new, but they’re tighter, last longer, and completely transformed how my car drove. I honestly didn’t realize how bad the original suspension had gotten until I replaced it.
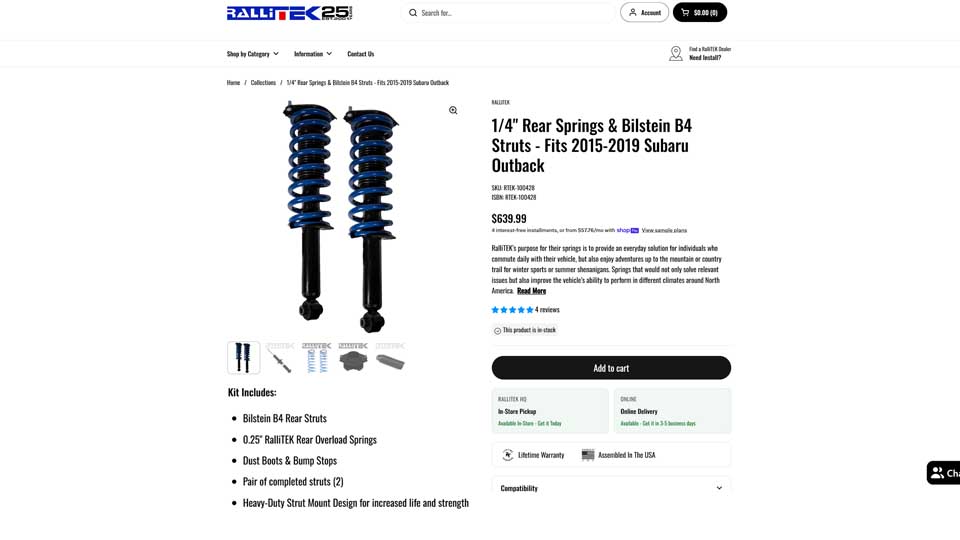
Since I knew I’d eventually be carrying a rooftop tent, I also chose rear overload springs because so much of the tent’s weight sits toward the rear of the vehicle. That upgrade made a noticeable difference.
There are plenty of lift options available, but I wasn’t interested in lifting my Outback very much. I chose the smallest option, around a quarter-inch of lift. It gave me just a little more wheel clearance for winter snow buildup without dramatically changing how the vehicle looked. If you like a more aggressive appearance, there are half-inch and one-inch lift options that completely change the look of the vehicle.
Bilstein B6
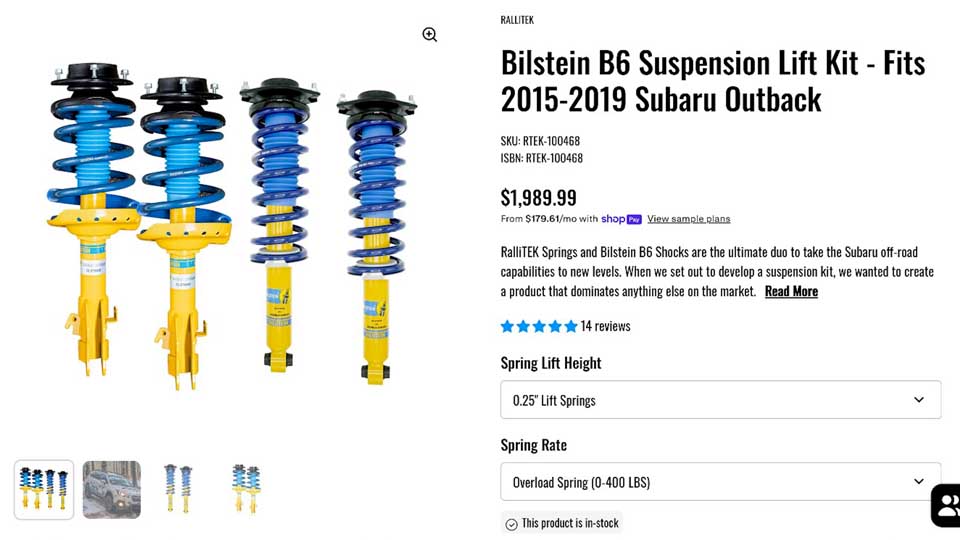
You could also step up to Bilstein B6 shocks, but those are much more oriented toward off-road driving. Since I spend most of my time on pavement, I preferred the B4s.
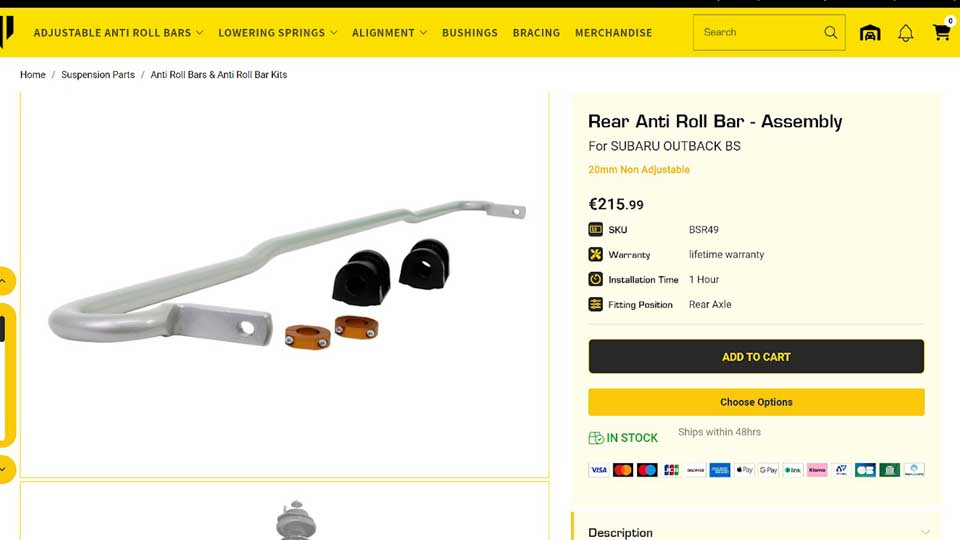
I also installed a slightly stiffer sway bar—not some huge racing sway bar—but just enough to tighten up the handling when all that weight is sitting on the roof. I believe I have a 19mm vs. the 16 mm sway bar it came with. It’s easy to check if you look under your car by the suspension. The Sway Bar is pretty visible. You can go 20 mm, 21 mm, or 22 mm, but the thicker you go, the worse it feels going over speed bumps or potholes.
I wouldn’t get a Rooftop Tent if you don’t have the right suspension.
Getting the Rooftop Tent On & Off
Another thing I underestimated is just how difficult these tents are to install and remove.
On
It takes at least two people to lift one on or off a vehicle, but realistically three or four people make the job much easier because the tents are so wide and awkward. Davey, a big strong guy who helped me initially get my RTT on, couldn’t believe it was 118lbs . He thought it was massively heavier.\
Off
Once the tent is mounted, you’re probably not going to want to remove it very often.
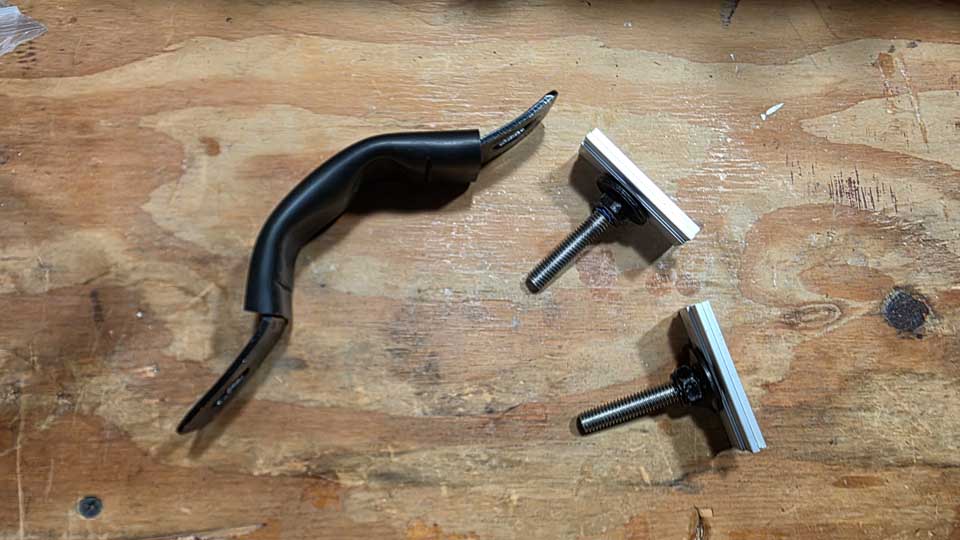
Most rooftop tents also come with inexpensive mounting hardware that uses long bolts. Those bolts bend easily during installation, and once they’re bent they often break when you try to remove or adjust them later.
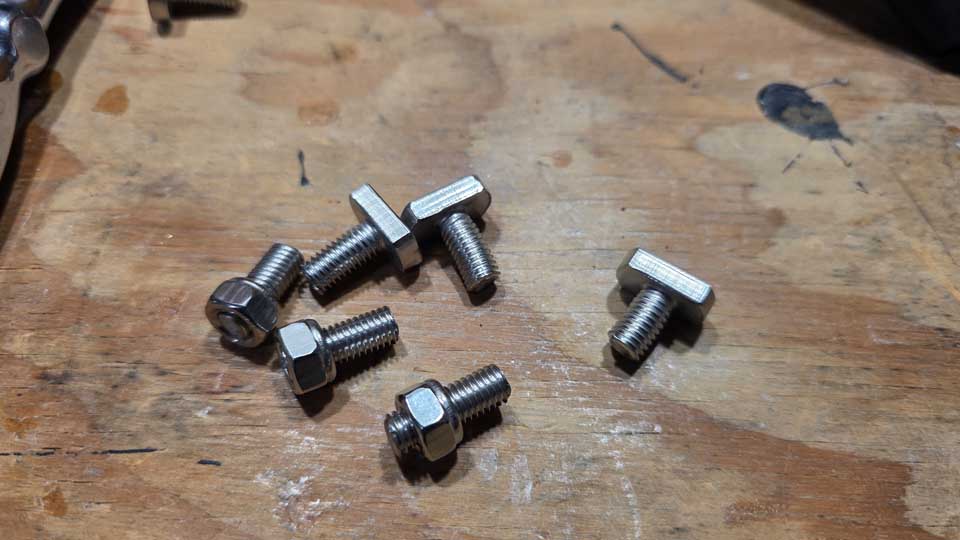
Because of that, I’d either plan on leaving your rooftop tent mounted most of the time or budget for aftermarket mounting hardware along with a better roof rack that makes removal much easier.
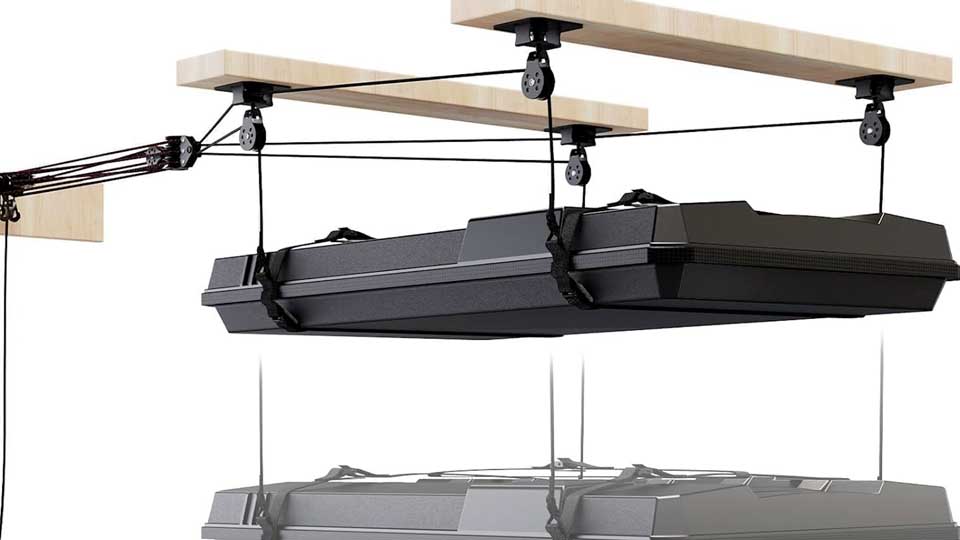
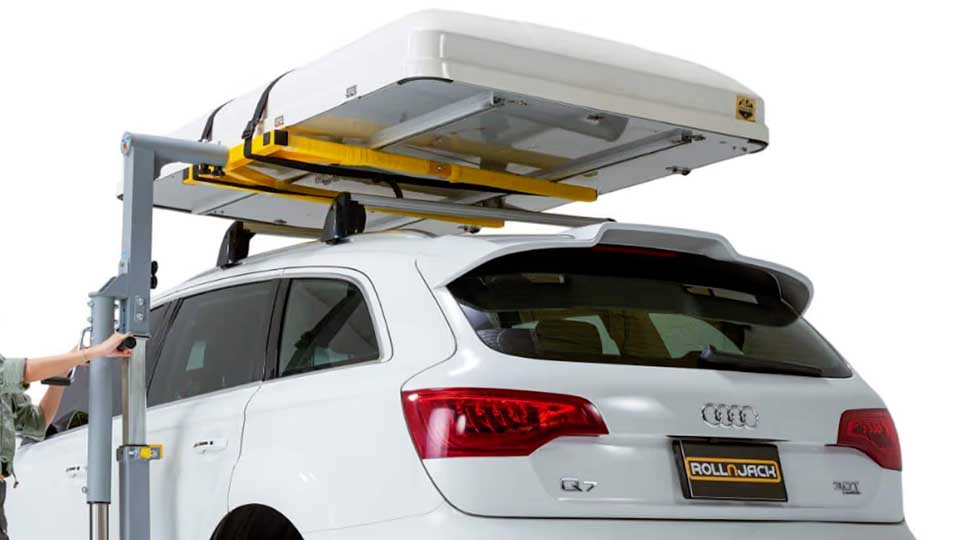
Some people even build ceiling hoists or install garage lifts just to get the tent off the vehicle safely. That’s another expense that’s worth thinking about before you buy.
Choosing The Right Rooftop Tent For A Car
There are many rooftop tents out there, but most won’t work for small to mid-size cars. Many make huge mistakes. There are a lot of things to consider when buying a rooftop tent, but two factors became much more important to me than everything else.
1. Weight Really Matters! Buy the lightest tent you possibly can.
Even if you’re camping every weekend, you’re still driving your vehicle to work, running errands, and doing everything else far more often than you’re camping. The less weight sitting on your roof, the more normal your vehicle will continue to drive.
Start by checking your vehicle’s dynamic roof load rating—not the static rating—and then stay well below it if you’re driving a small or mid-size vehicle.
For example, my 2015 Outback with my aftermarket rack is rated for roughly 300 pounds of dynamic weight. But I intentionally chose something much lighter at around 119–125 pounds. Even my stock rack mounts were rated for 150- 175 lbs (depending on who I asked at Subaru) of dynamic weight, which seems very optimistic given their flimsy crossbar connectivity.
But it’s not about the dynamic weight rating as much as your suspension’s ability to handle it on the road. Even with really good suspension, you still will appreciate the lightest tent possible on your roof.
2. Make sure there’s enough room inside the closed tent to store bedding or gear
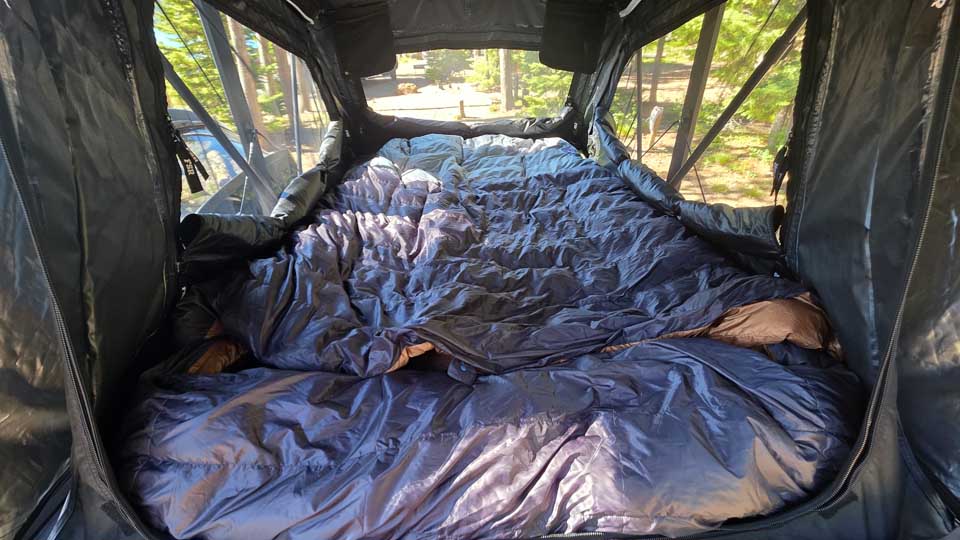
Not having enough room in your tent to leave bedding in there makes it a pain in the ass to set up. You want room for bedding and maybe even a memory foam topper when the tent is closed. It’s so great to flip out your tent and only know you need to bring up a pillow.
Rooftop Tent Designs
Once you know the weight you’re comfortable carrying, you’ll have to choose between the three main rooftop tent designs.
Clamshell Tents
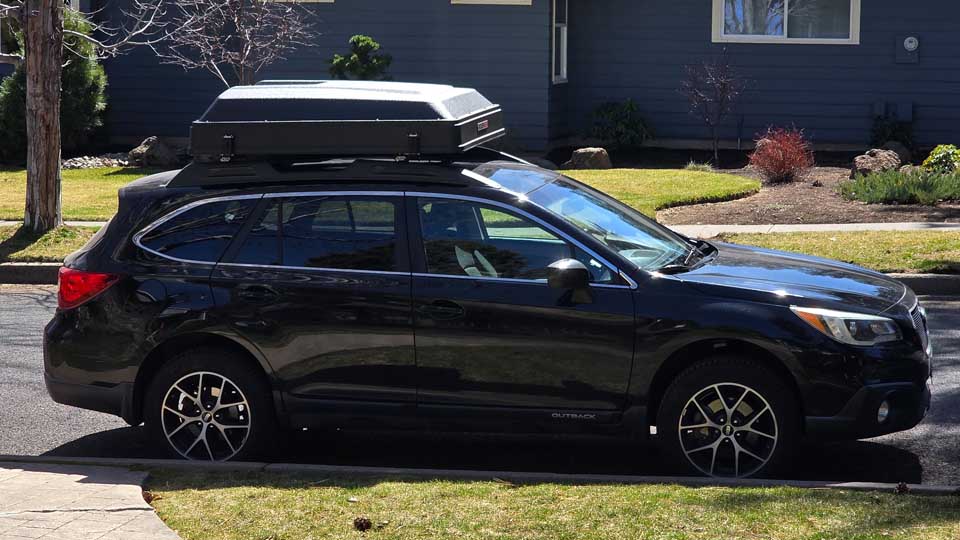
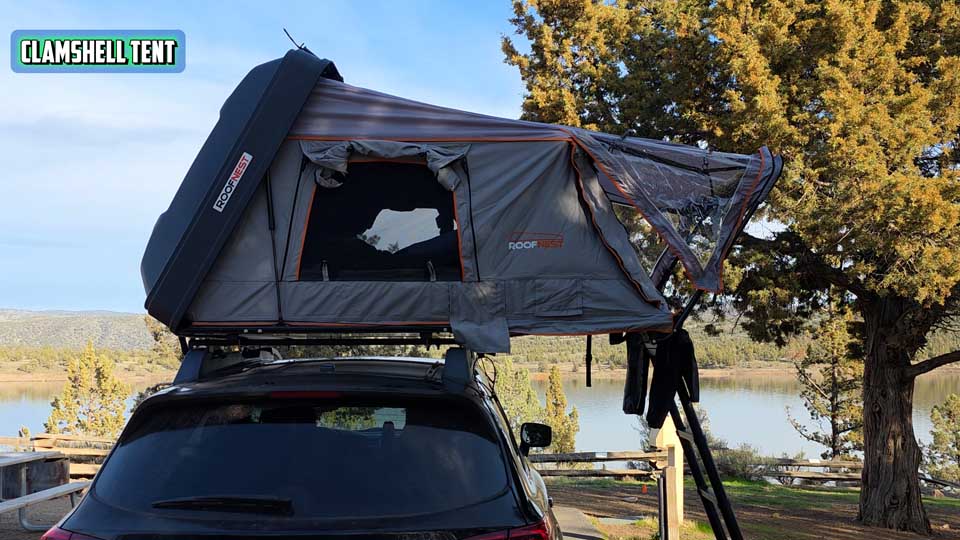
A clamshell is generally the most reliable option. It opens very quickly, usually looks good for a long time, and offers excellent weather protection.
The downside is that it’s often the heaviest option available and usually the most expensive.
Soft Shell Tents
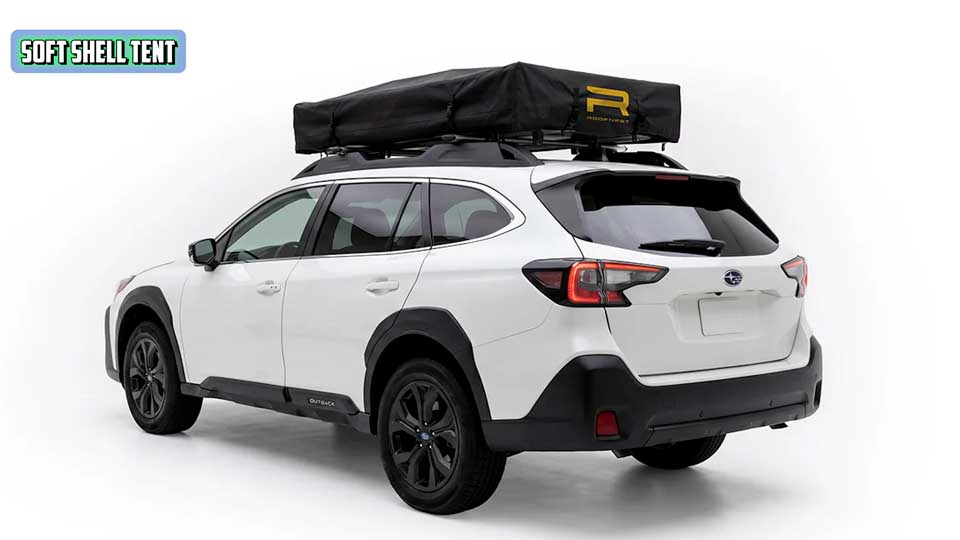
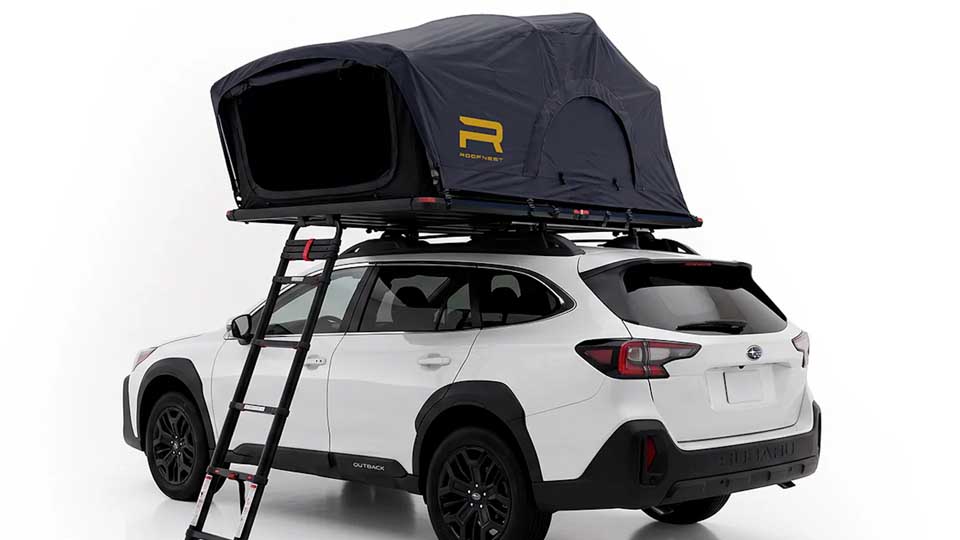
Soft shell tents are generally the lightest and least expensive.
The downside is the soft cover fades over time, setup and breakdown take considerably longer, and the cover can become wrinkled and noisy while driving.
I knew almost immediately that this style wasn’t what I wanted because quick setup was one of the main reasons I was buying a rooftop tent in the first place.
Hybrid Tents
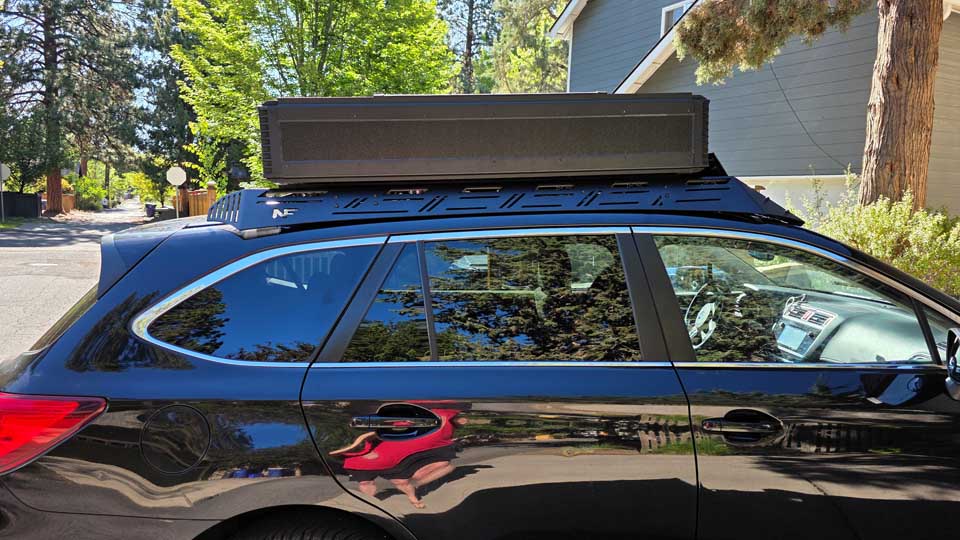
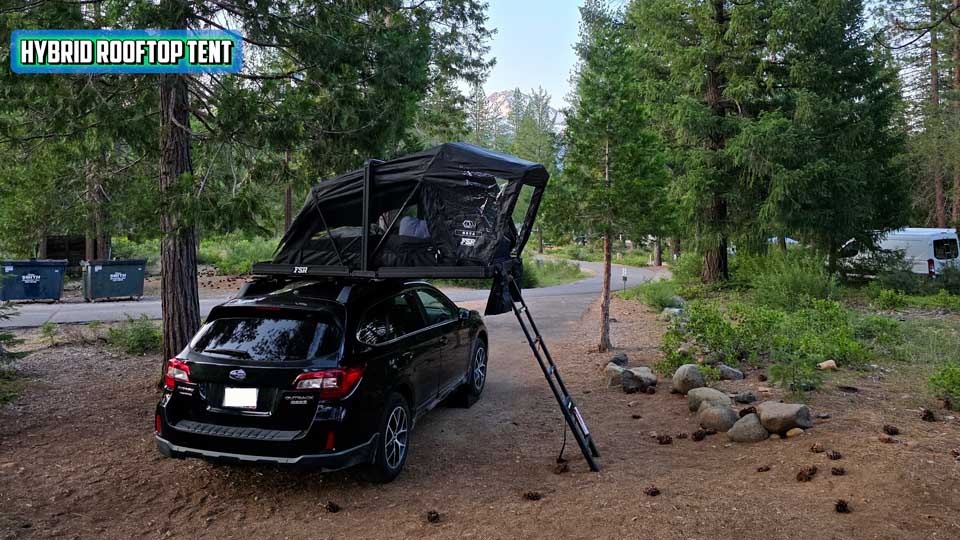
I eventually chose a hybrid design.
These use a hard shell for protection while driving but open like a traditional tent instead of a clamshell.
For me, this offered the best balance. It retained the durability and appearance of a hard shell, set up extremely quickly, and ended up being one of the lightest options available.
The Rooftop Tents I Tested
TopOak Vision
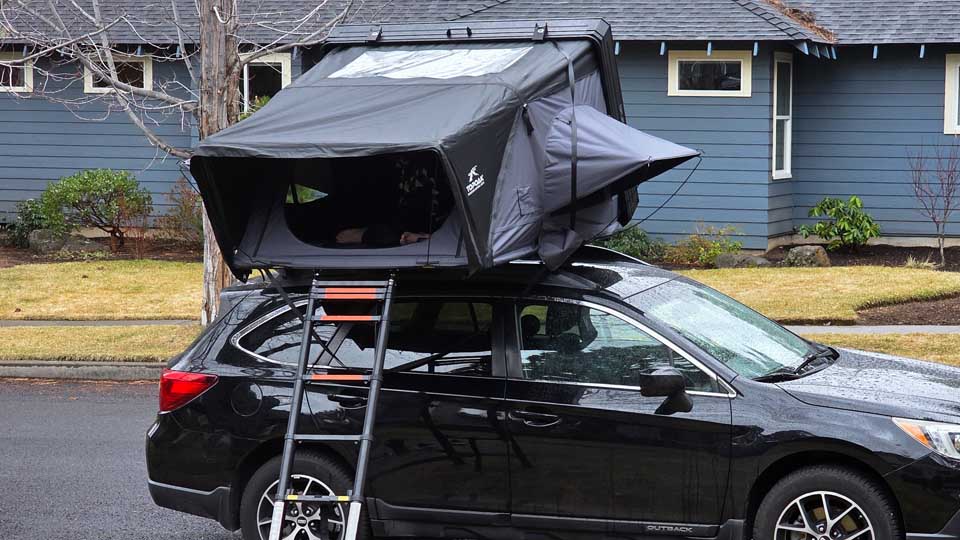
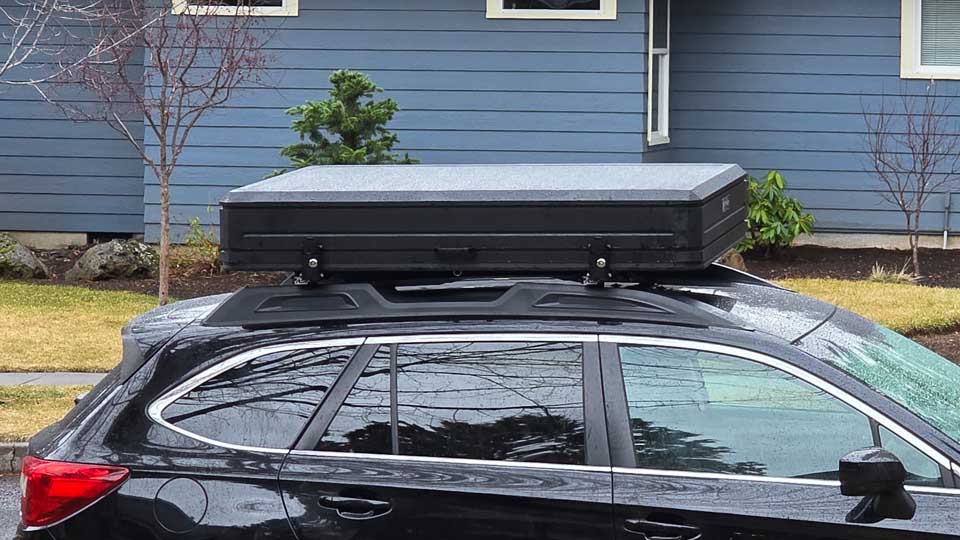
To give you an example of what didn’t work for my vehicle—even though it’s an outstanding tent—let’s start with the TopOak Vision.
If you own a larger SUV or a truck, this is a fantastic option.
At roughly 176 pounds, it was by far the biggest tent I tested. It offered the most interior room, somewhere between a queen and king-size bed, and overall I thought it was an excellent product.
The problem wasn’t the tent.
The problem was my vehicle.
Even with Bilstein shocks and rear overload springs, it was simply too much weight for my Outback and for how I like to drive. I didn’t want to become the person slowing everyone down on mountain highways because I had so much weight sitting on the roof.
For a truck or larger SUV I’d absolutely consider it, but for my Outback it was simply too much.
Roofnest Condor 2 / Condor Air
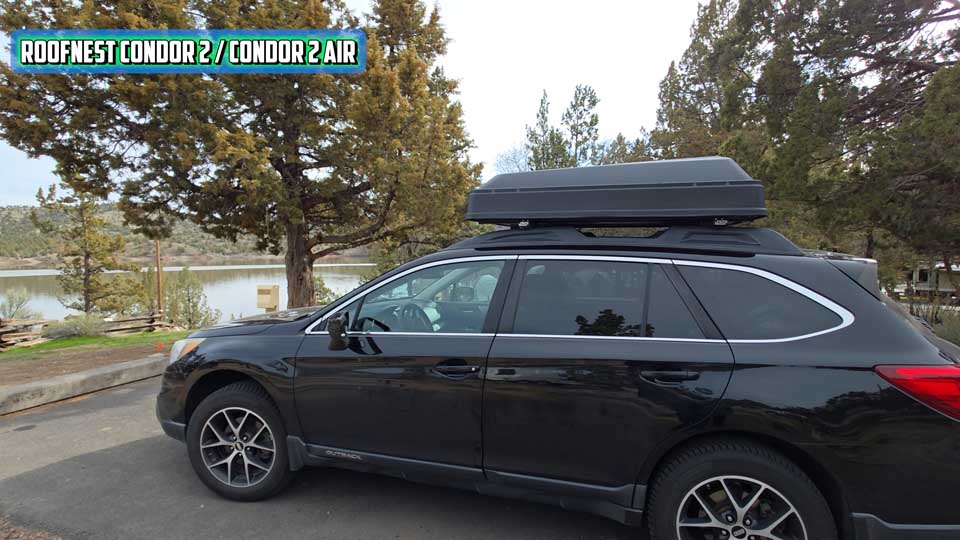
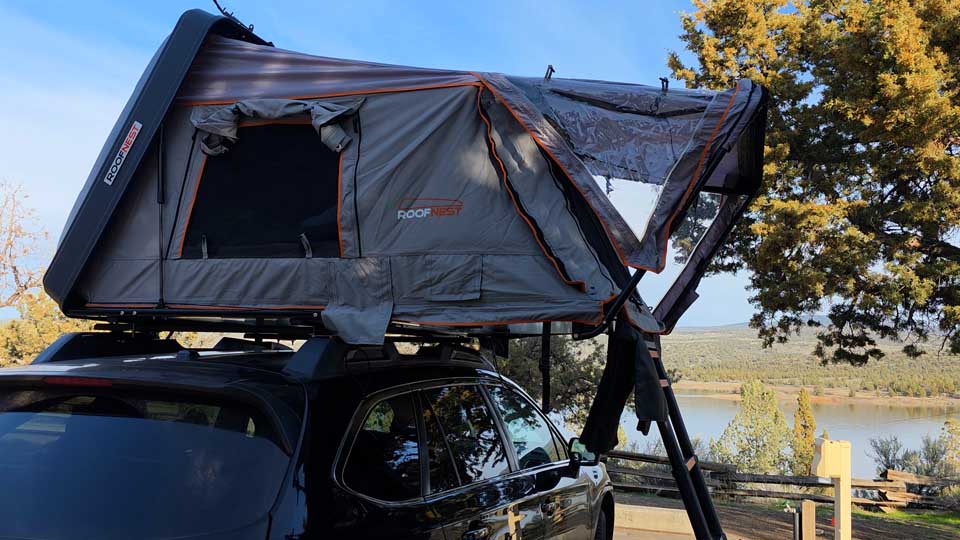
Next I tried the Roofnest Condor 2 last year, but today there’s also the lighter Condor Air at around 145 pounds. Mine weighed closer to 149–150 pounds.
I loved how sleek and aerodynamic it looked, and the overall size fit my Outback very well.
Unfortunately, this was the biggest disappointment of my rooftop tent search.
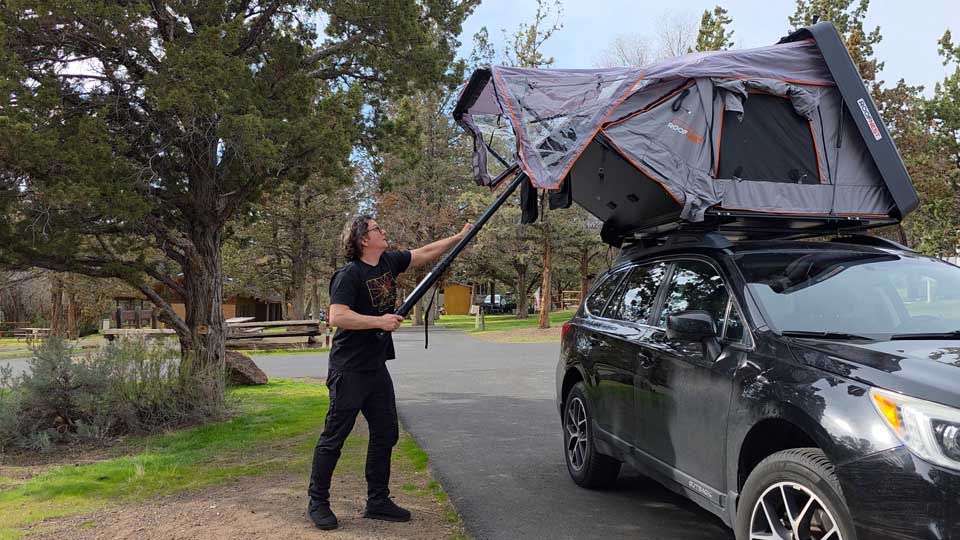
The first issue was that opening and closing it was never smooth.
It constantly hung up while opening and took far longer to close than I expected. No other tent I tried did this, and none of my friends had this issue with their tents from different manufacturers.
The second issue was storage.
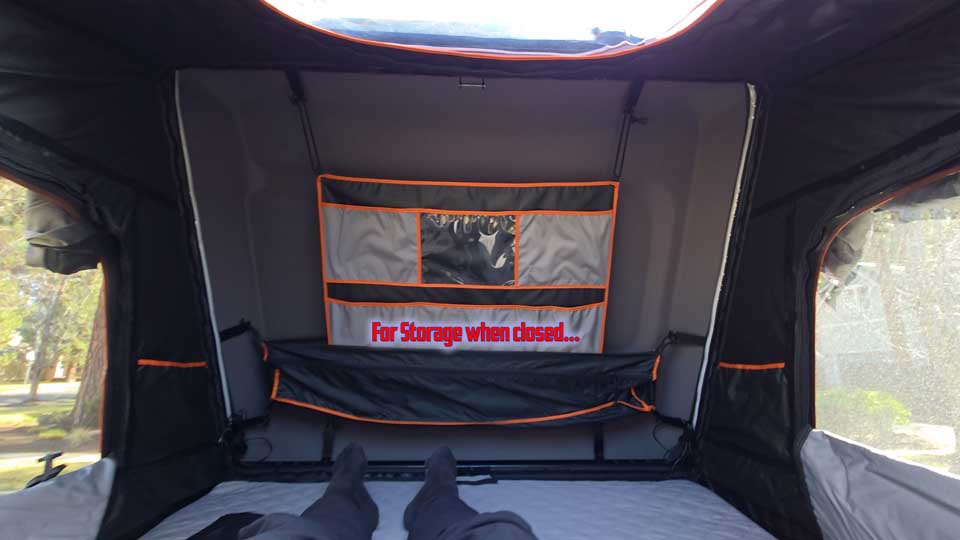
Even though Roofnest advertises interior storage space, I found there was really only enough room to leave a very packable blanket inside and a sheet. That meant every camping trip still required bringing sleeping bags and bedding in separately, which defeated much of the convenience I wanted from a rooftop tent. Like I said it barely closed with nothing inside it so I never tried to add sleeping bag.
Thirdly, this had really bad condensation.
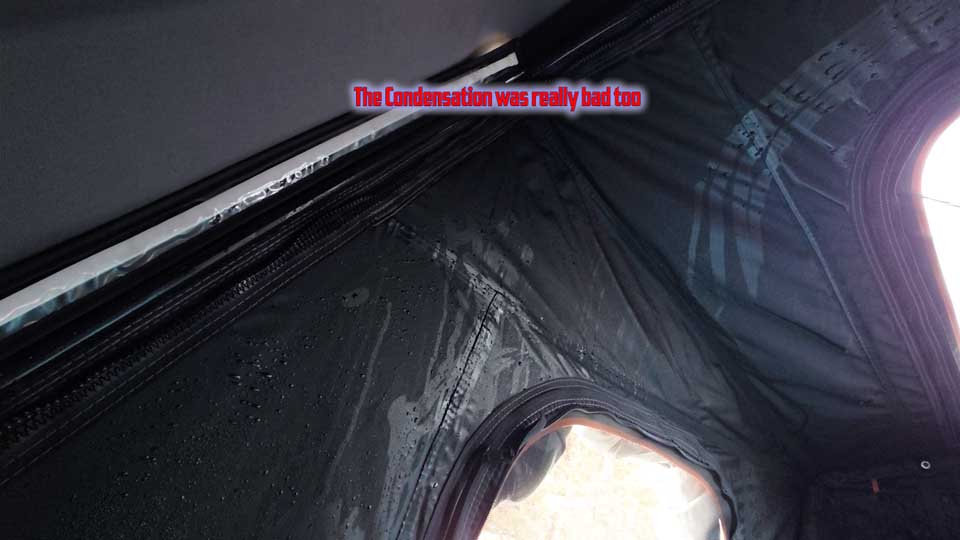
No other tent had this problem. I tested my FSR Nova in the same temperature and humidity with almost 1/4th the condensation. I reached out to Condor, and they said it’s important to get motorized pumps if you want to avoid condensation, so they are aware of this.
Lastly, I had to change out the brackets and all the fabric
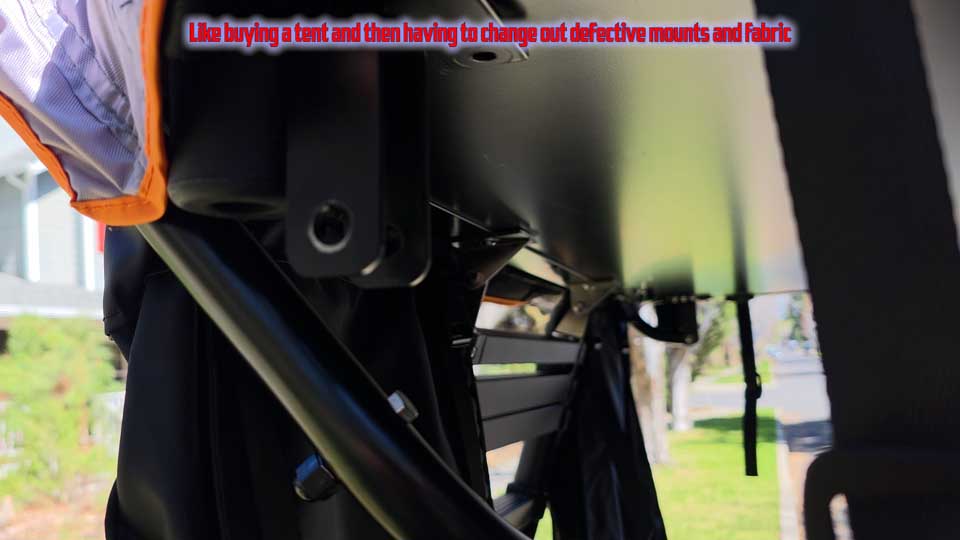
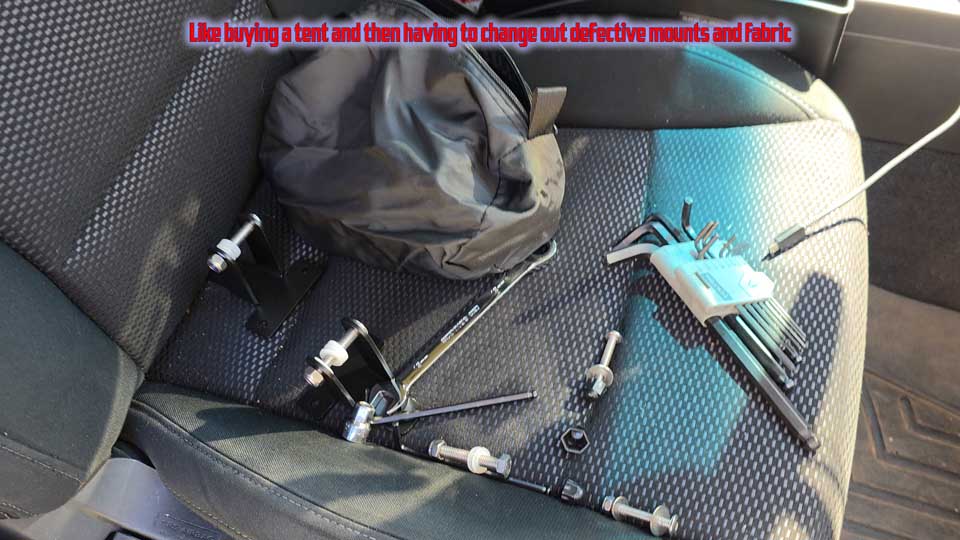
I didn’t get into this much in the Video above, but I will here and in the more in-depth review I’m going to make. Roofnest told me that the problems I had opening and closing their tent were due to improper fabric length and the initial brackets weren’t made to spec. They sent me the new fabric and brackets free of charge, but I lost a lot of time changing these out. It wasn’t hard but took me about 1.5-2hrs. After I changed everything out, it opened/closed much better, but it still was a touch sticky.
Because of those issues, this is one I wouldn’t personally recommend: the Roofnest Condor 2. Based on the improvements mentioned on the Condor 2 Air page, they haven’t addressed any of the issues above, so I wouldn’t recommend the newer version either.
iKamper Skycamp Mini 3.0 and Skycamp 4.0 Duo
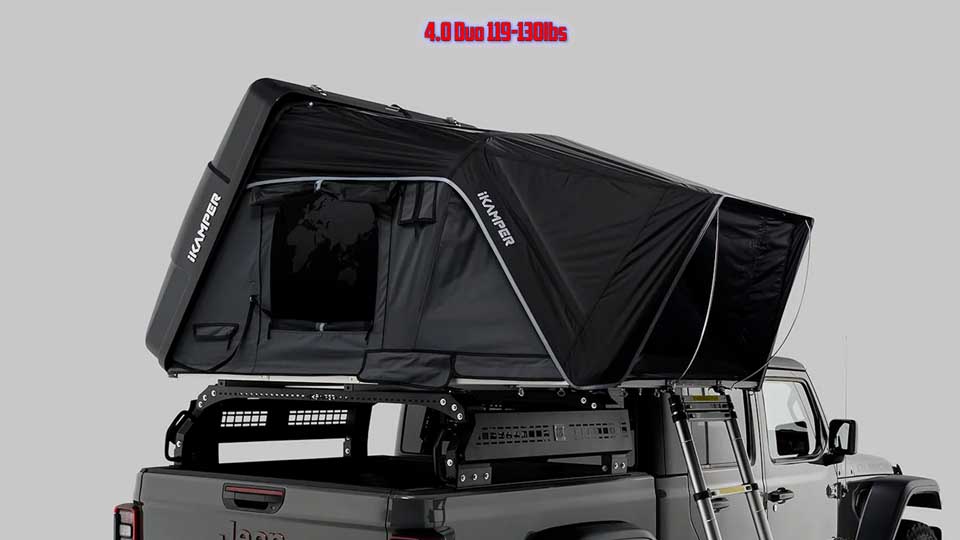
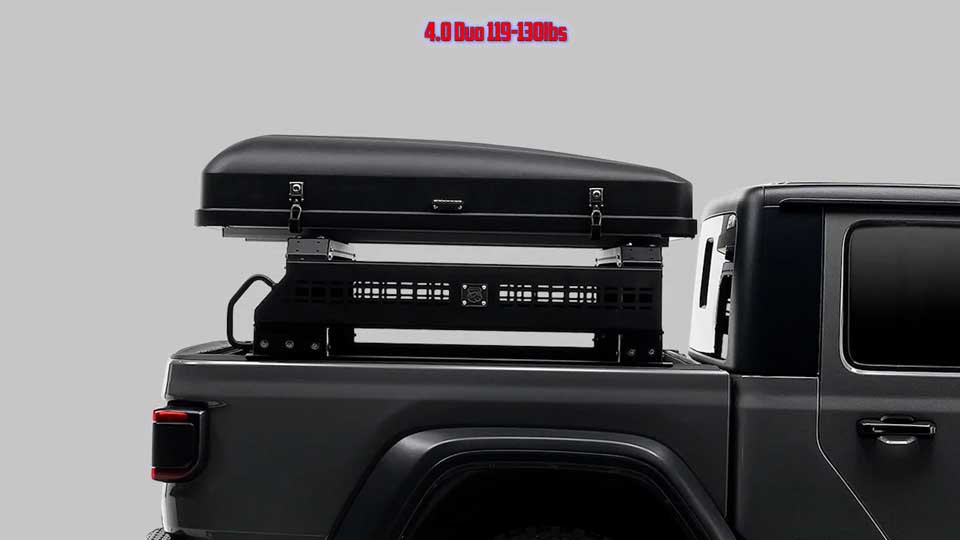
After that, I looked seriously at the iKamper Mini. The only reason I didn’t buy it was price. At $4,000-$4,500 that was out of my price range for the Duo 4.0. Even the Mini 3.0 on closeout is pricey at $3,000.
Buy The IKamper Skycamp Mini 3.0 From REI
Why I didn’t try them
By this point, I had already spent money buying and selling other tents, upgrading suspension, and planning for a roof rack. Spending nearly twice as much on the tent simply wasn’t something I wanted to do.
If money isn’t a concern, though, the iKamper Mini or Duo looks like it solves many of the issues I had with the Roofnest Condor 2. It weighs around 125 pounds, has better interior storage, allows you to leave bedding inside, offers a nicer mattress accessory at a pretty high price, and remains extremely aerodynamic. It would have been nice to try, and I’ve read many good reviews for it.
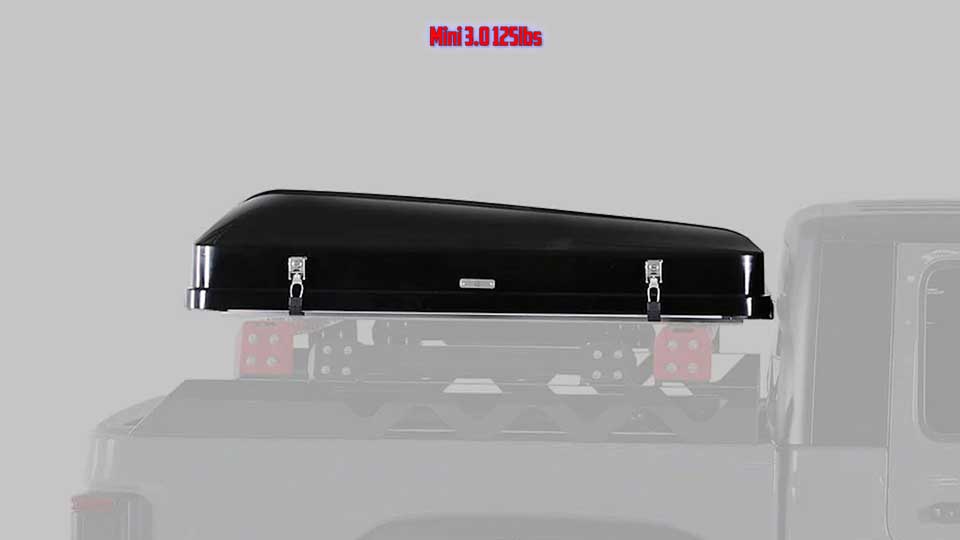
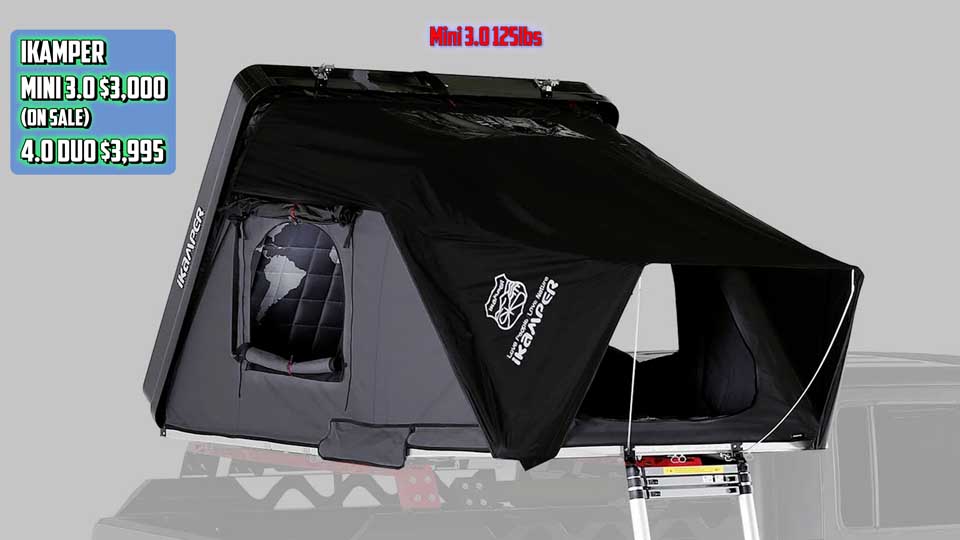
For a small or mid-size vehicle like an Outback, it’s a very compelling option. The Mini 3.0 seems like a decent deal for an iKamper, but the changes in the Duo 4.0 seem nice.
The only thing I didn’t like was the price and the width. At 54.75″ wide, the Mini 3.0 hangs well over the sides of my 15 Outback. The Duo 4.0 is better at 52 3/8,” but it still hangs over a lot. Actually, anything over 40-44″ wide, depending on the rack you get, will hang over a little, so I didn’t want that Airplane wing look.
FSR Nova (My Choice)
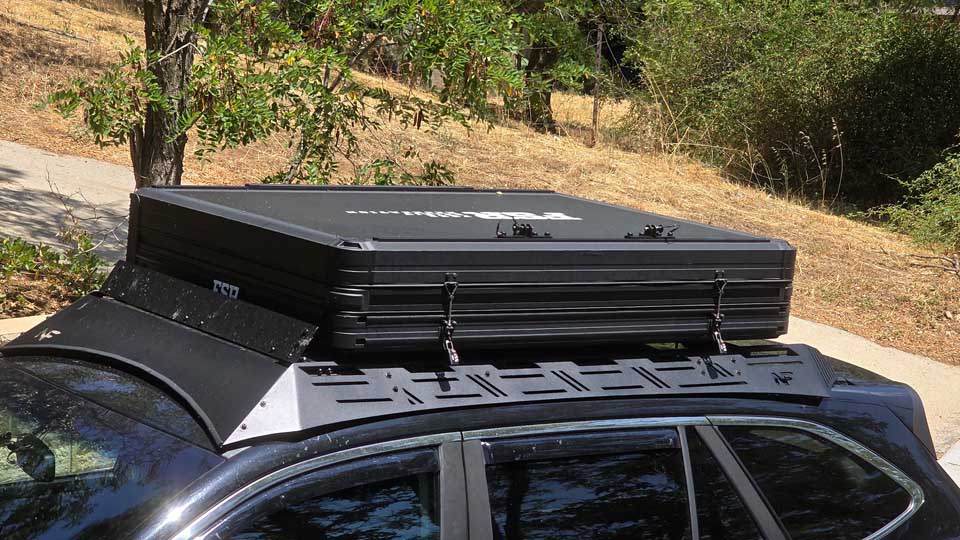
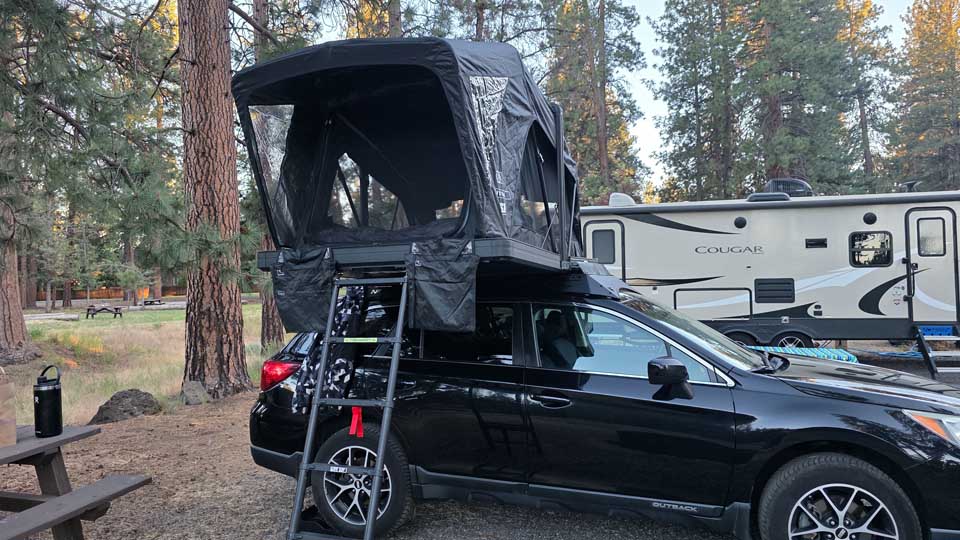
After selling my previous tents and passing on the iKamper Mini, I eventually found the Free Spirit Recreation Nova Rooftop Tent.
This was a brand-new tent when I bought it, and it ended up checking almost every box I was looking for.
At roughly $2,200, it costs substantially less than an iKamper Mini while weighing only about 132 pounds with the ladder installed.
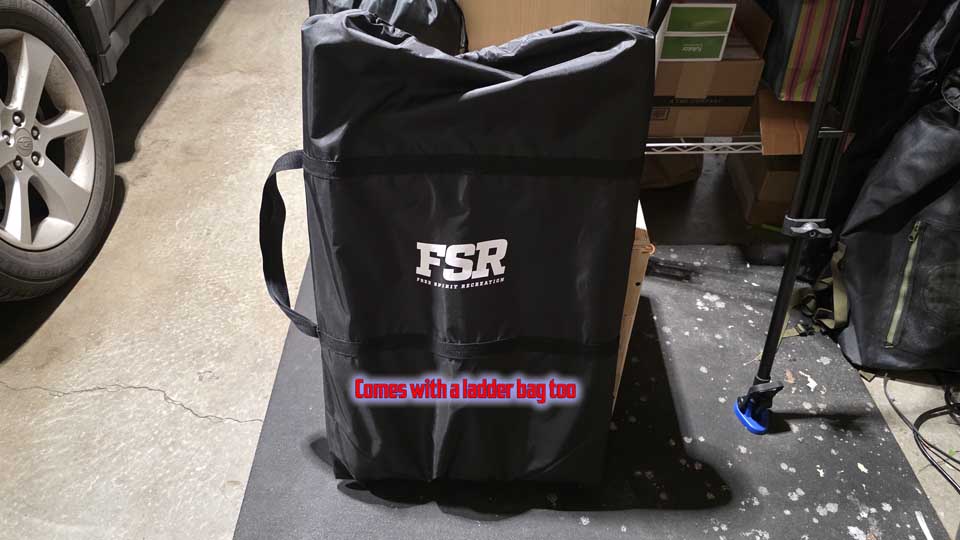
The nice thing is the ladder isn’t permanently attached. You can simply store it inside your vehicle while driving, dropping the rooftop weight to around 119 pounds. That made a difference for my Outback when it comes to handling.
The Nova uses a hybrid design with a hard shell while driving but opens like a traditional tent once you’re at camp. Setup is incredibly fast because there aren’t large window awnings that require support rods like many other rooftop tents. Despite having to install the ladder each time, I still found setup quicker than many clamshell tents.
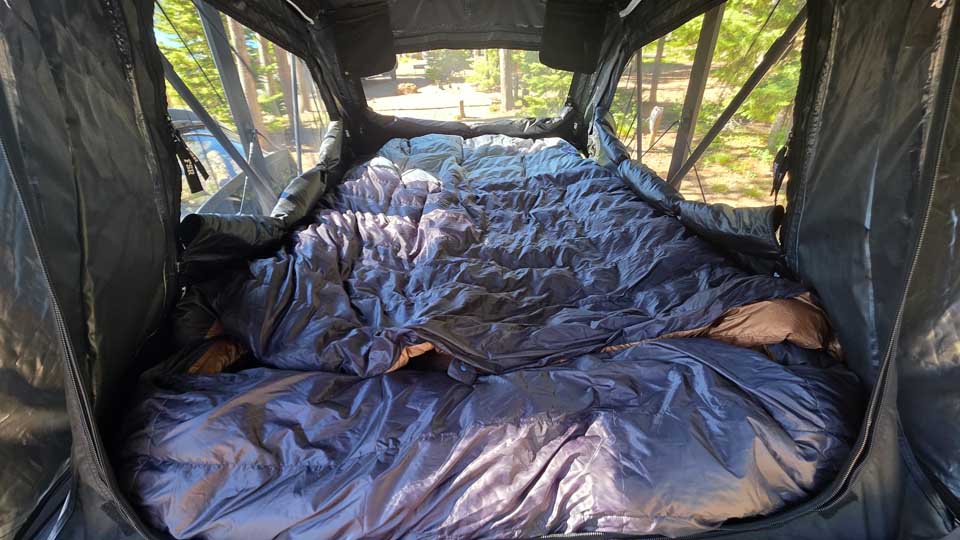
The biggest surprise was the interior storage. Without putting the ladder in, there was enough room to permanently leave my sleeping bag inside, and I even had enough extra space to add additional sleeping pads for an extra cush night’s sleep.
For the money, this tent punches well above its price point.
The only real downsides are.
- The FSR Nova isn’t particularly aerodynamic; it’s more of a low-profile rectangular box than a sleek wedge. Fortunately, it’s narrow enough that I found the trade-off well worth it.
- It’s got the smallest bed of any small Tent I’ve tried at 45″ wide. Most are around 50,” and you feel the difference.
Choosing the Right Roof Rack
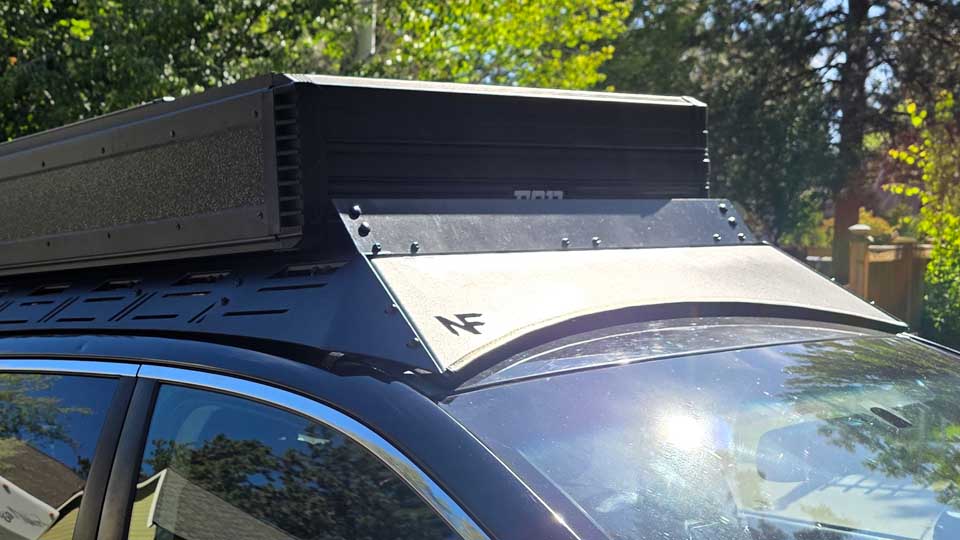
Once I had the tent I wanted, I needed to figure out the roof rack. I originally thought the roof rack would be more of an afterthought, but I quickly realized it was almost as important as choosing the tent itself.
Most small cars don’t come with a roof rack designed for rooftop tents.
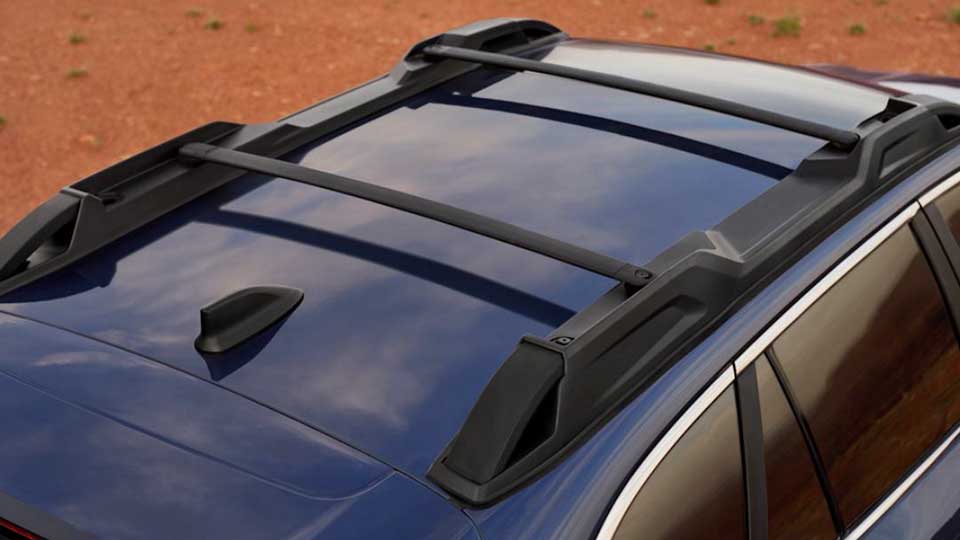
Even vehicles like the Subaru Outback, which have factory roof rails and crossbars, generally aren’t rated for rooftop tents. The exception is the newer 2026 Outback, and maybe a few Wilderness models, but for most Subarus you’ll want an aftermarket solution.
I’ve heard enough horror stories that I wouldn’t trust the factory setup.
Another thing I learned is to prioritize a rack that works with a wind fairing. A surprising amount of wind gets underneath a rooftop tent, creating a lot of noise. A good wind fairing makes a huge difference.
Budget Roof Rack Options
The first category is the more affordable roof rack options, generally in the $300–700 range.
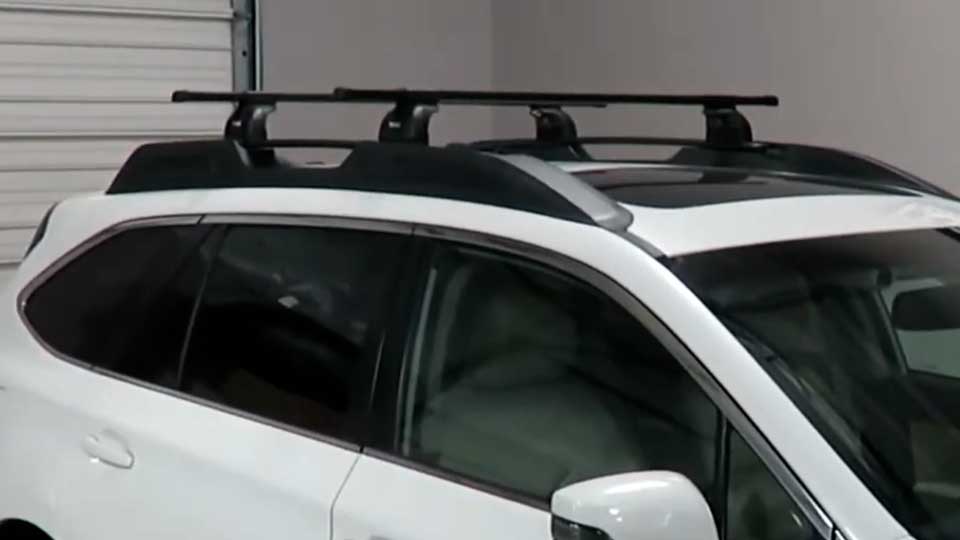
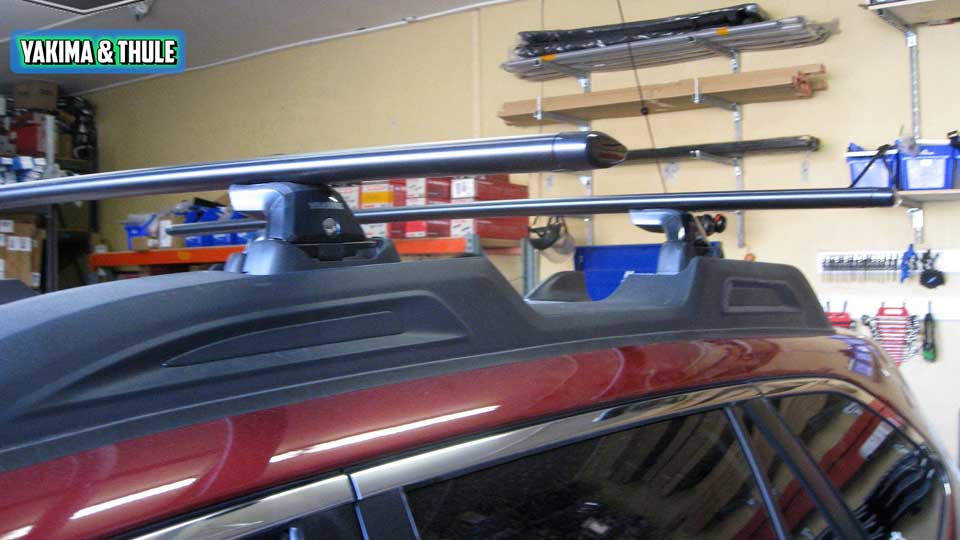
For my 2015 Outback, there were Yakima and Thule options that replaced the factory crossbars. The problem is they sit much higher above the roof.
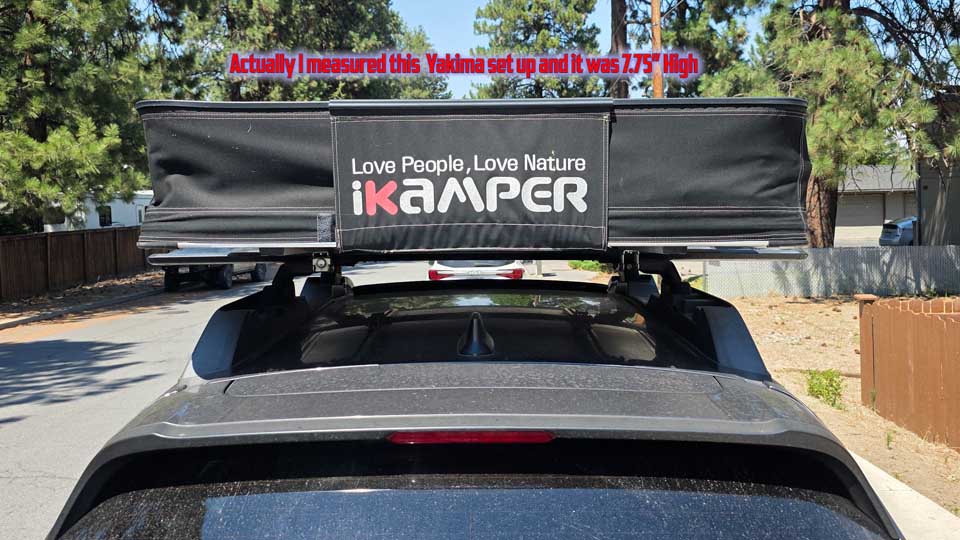
That extra height noticeably affects handling, and they’re also surprisingly expensive for what you get at $500-$700 plus. It’s also a really complicated purchase because you have to contact each site to get all the parts you need. It doesn’t come in a kit.
The one advantage is they’re easy to access underneath the tent if you ever need to make adjustments.
Other than that, I wasn’t willing to accept the extra height.
Anderson Designs Fabrication Crossbars
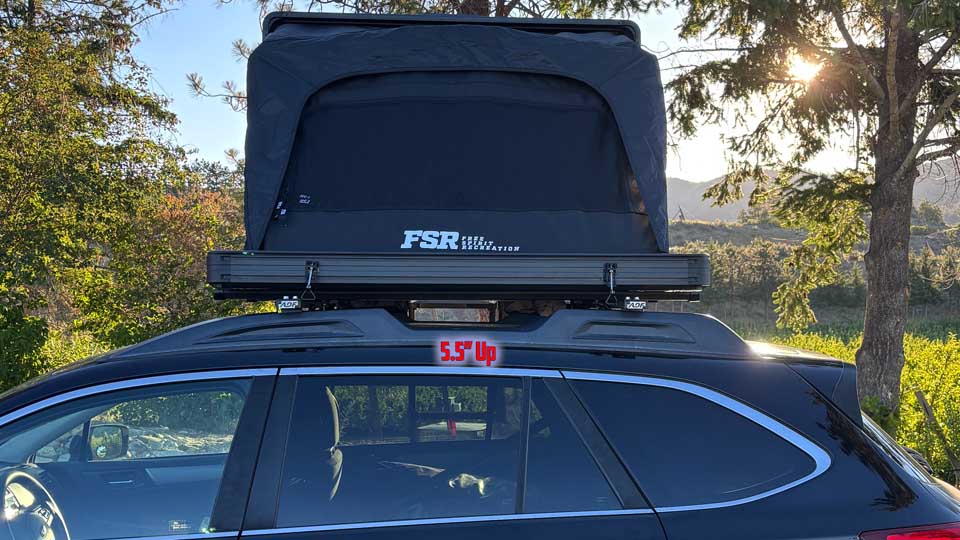
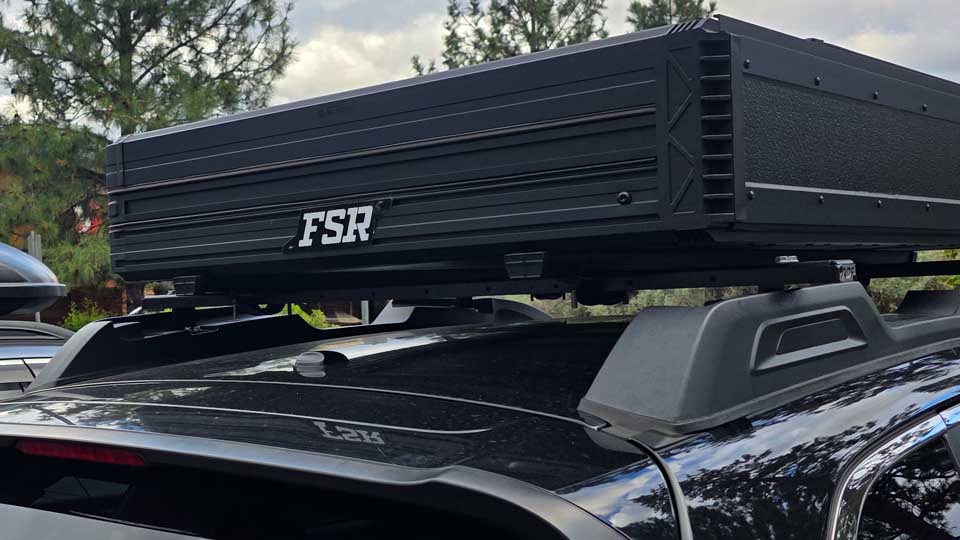
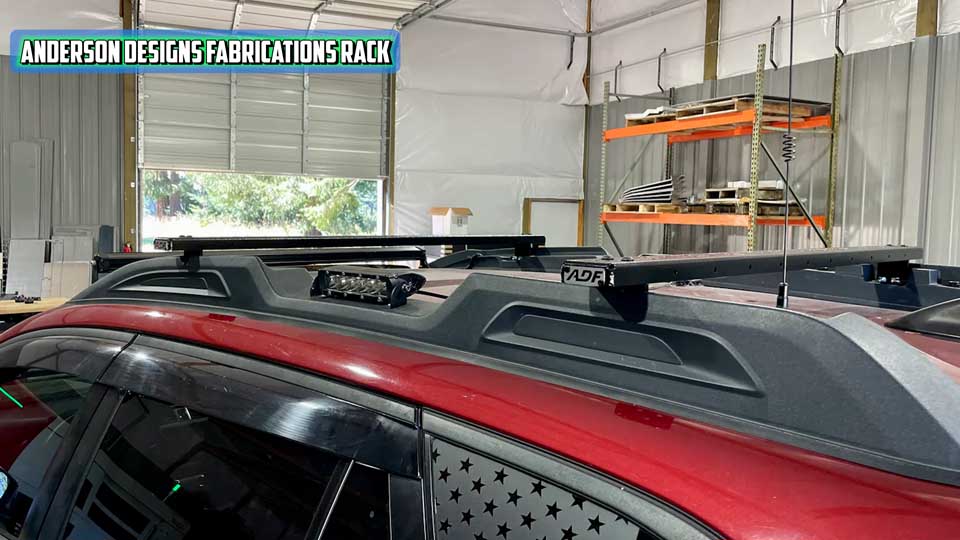
The next option was Anderson Designs Fabrication at around $300. This is a great price.
They’re sturdier than comparable Yakima or Thule options, considerably less expensive, and they sit lower on the roof, which is really good.
I do wish Anderson Designs Fabrication made a shorter crossbar that fit down between the roof rails because it would be more aerodynamic and fit perfectly.
Instead, the bars extend outward, which creates additional wind noise.
Even so, if you can’t justify stepping up to a full replacement roof rack, this is easily the option I’d choose over Yakima or Thule.
With the Anderson setup, there was only about a 5.5-inch gap between the roof and the bottom of my tent. The Yakima and Thule options sat much higher at 7.75″ at least, and being so high up really affects your handling.
Premium Low-Profile Roof Racks
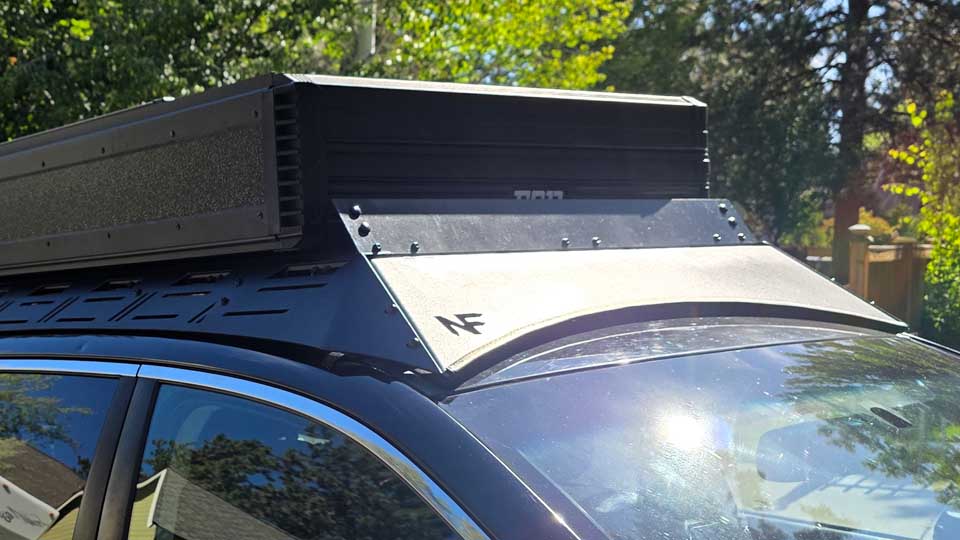
The next category completely replaces your factory roof rack. Installation is much more involved because the headliner has to come down. It’s definitely a pain, but the payoff is huge.
With the Anderson Designs setup, my tent sat about 5.5 inches above the roof. With one of these premium systems, I reduced that to roughly 2.25 inches. That completely transformed how my Outback drove. It almost felt like there wasn’t a rooftop tent on the vehicle anymore.
These systems generally run between $900 and $1,700, depending on configuration. They’re expensive, but in my opinion they’re worth every penny because they improve handling, reduce wind noise, improve fuel economy, and offer better strength.
Prinsu Roof Rack
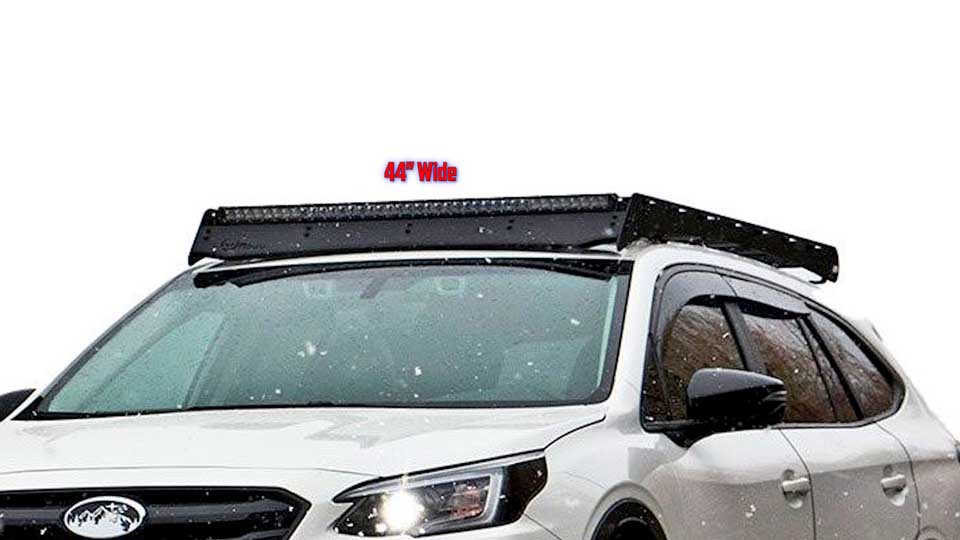
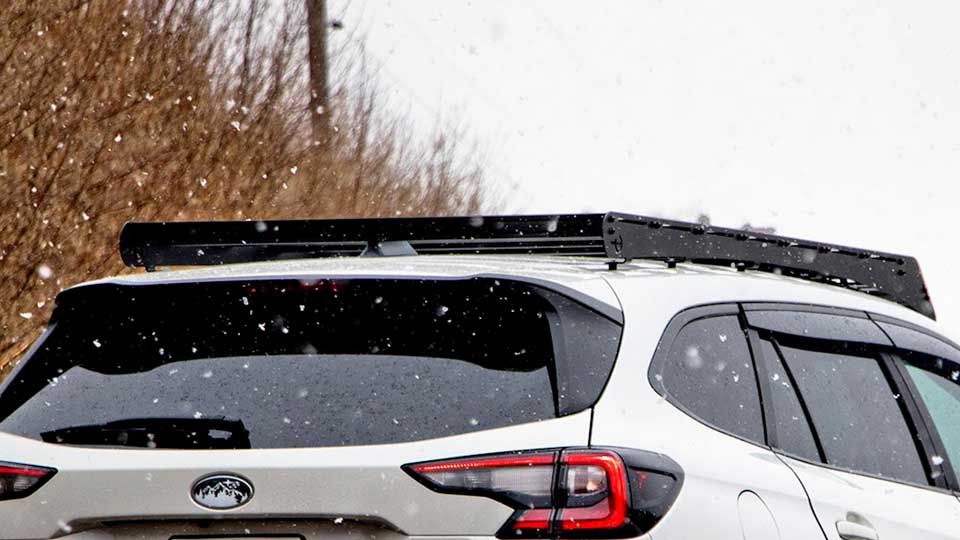
The first option is the Prinsu rack. It’s the least expensive of the premium systems and probably the most popular. The downside is installation. Not only do you have to remove the headliner, but you also have to drill holes in your roof. That makes it extremely secure, but it also makes it permanent. If you ever think you’ll want to return to the factory roof rack, that’s something to consider.
One thing I really like is the 44-inch width. That gives wider rooftop tents plenty of support. For example, my Free Spirit Recreation Nova RTT is about 42 inches wide, so it would sit perfectly centered with a little room on either side.
Another huge advantage is that you can mount the crossbars directly to the rooftop tent and simply lower the entire assembly onto the rack. Since the rack itself sits only about two inches above the roof, you’re only around three inches above the roof once the tent is mounted. That’s dramatically lower than the Anderson setup.
The Prinsu is also compatible with accessories from companies like JC Offroad and Victory 4×4, including excellent wind fairings that significantly reduce wind noise.
Sherpa Roof Rack
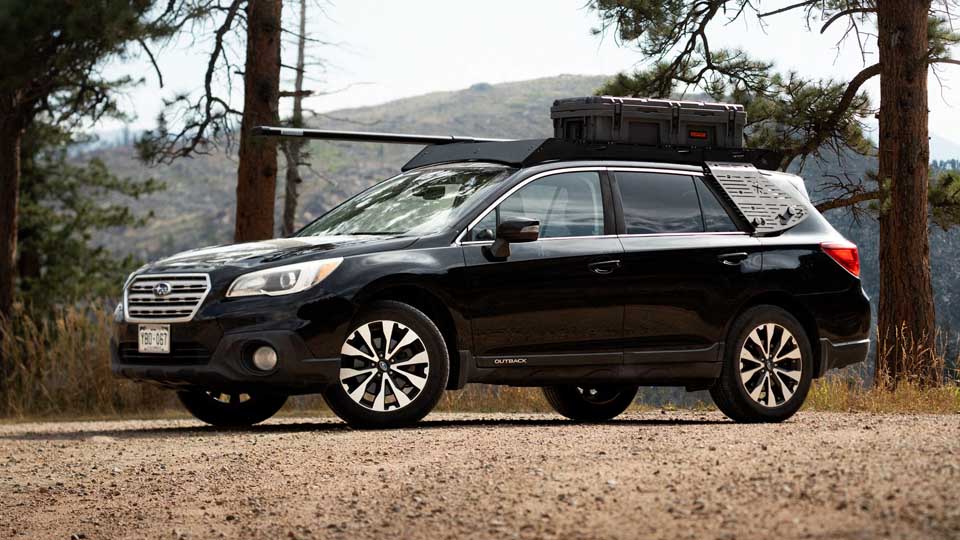
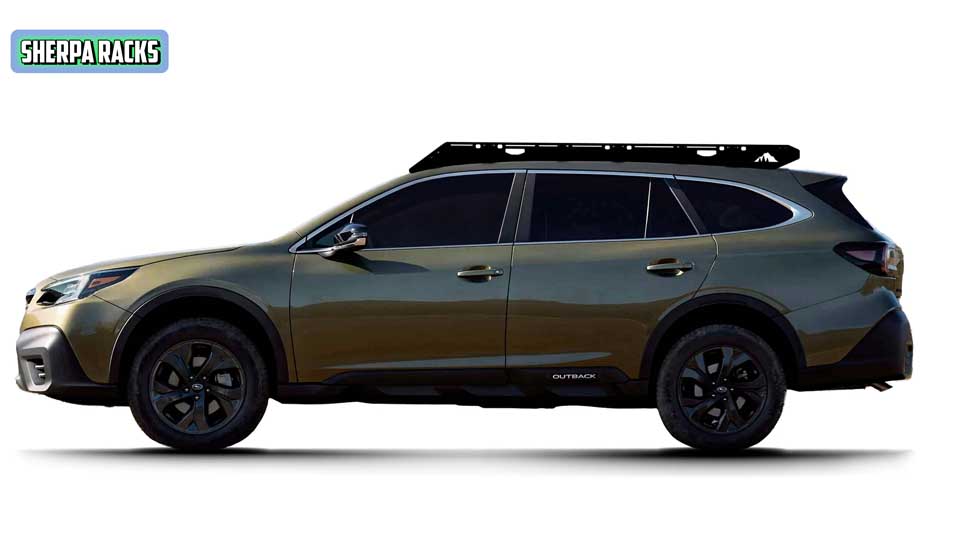
The Sherpa rack costs a little more, around $1,299.
Like the Prinsu, you have to remove the headliner, but you don’t have to drill into the roof. That’s a major advantage if you ever want to return to the factory setup.
Like the Prinsu, you can mount the tent to the crossbars first and lower everything into place.
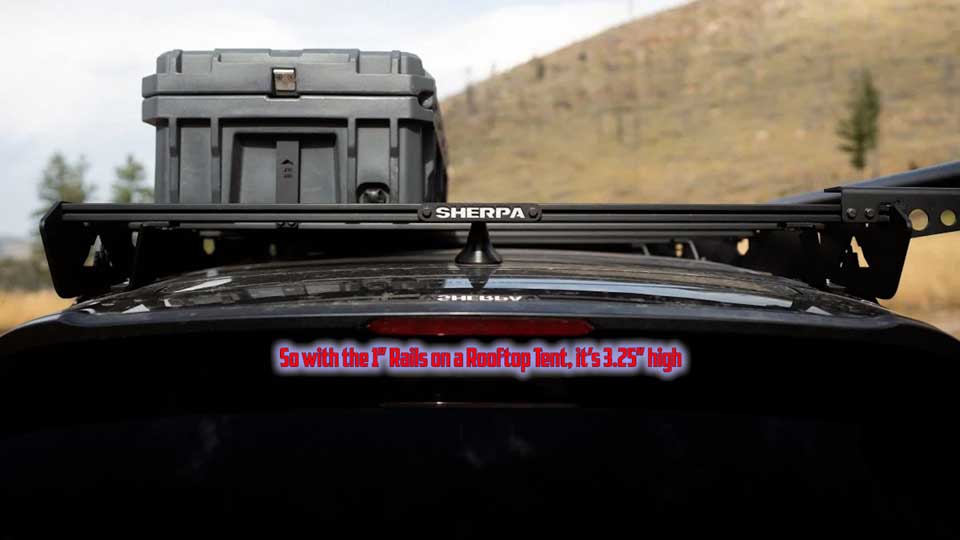
The Sherpa sits roughly 2.25 inches above the roof, making it much lower than any of the budget options but a little higher than Prinsu and NashFab.
It’s 44 inches wide, so it works with the same JC Offroad and Victory 4×4 wind fairings while supporting wider rooftop tents.
It’s more expensive than the Prinsu, but if preserving the factory roof matters to you, it’s definitely worth considering.
NashFab Roof Rack
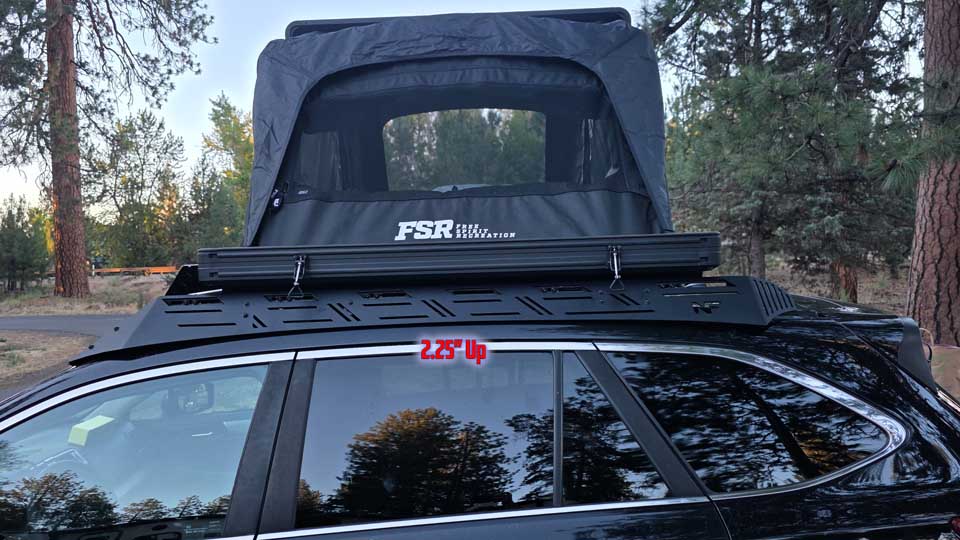
Finally, there’s the NashFab roof rack. It’s the most expensive option I looked at, around $1,379. Unlike the others, it’s narrower and shorter, but it sits only about 1.5 inches above the roof. Even more importantly, the crossbars sit roughly 1.25 inches above the roof.
That allows the rooftop tent to sit incredibly low. This is ultimately the rack I chose. Part of the reason was that I really liked the unique design, but the biggest reason was simply how low it mounted the tent.
The only downside is the narrower crossbars.
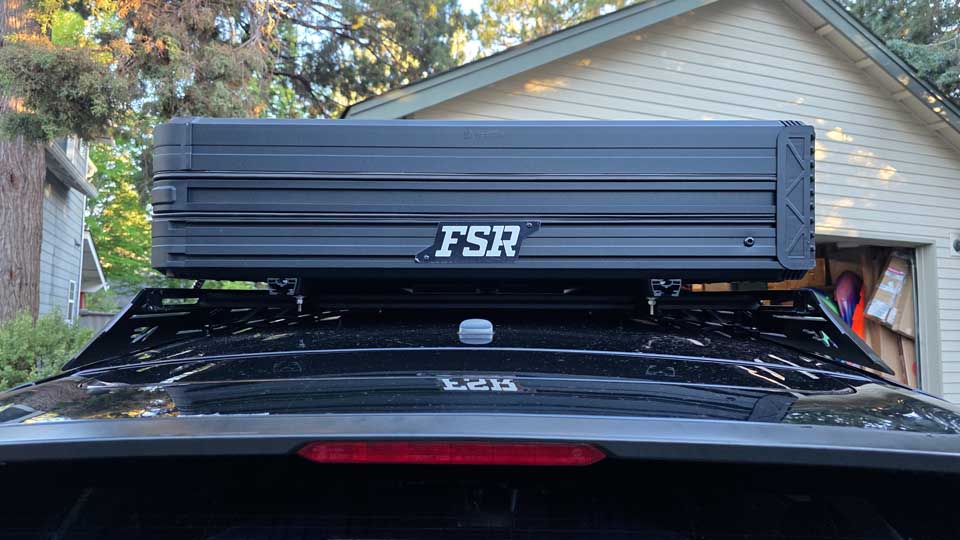
Because they’re under 40 inches wide instead of 44 inches, the excellent JC Offroad and Victory 4×4 wind fairings don’t fit without modification.
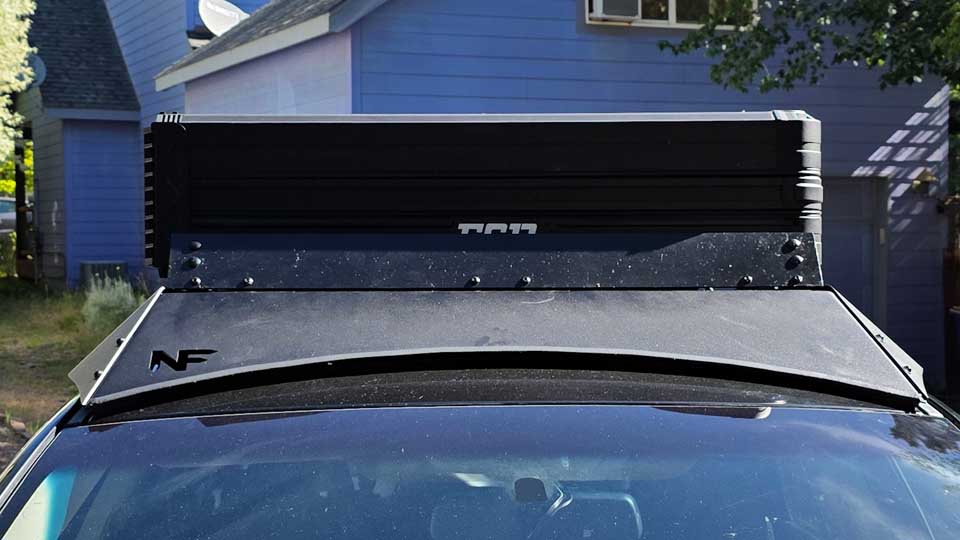
I ended up cutting mine down with a hacksaw and poorly repainting it so it would fit. Without a wind fairing, the wind noise underneath the tent becomes difficult to live with during long drives, so I had to make this mod work.
Installing the Roof Rack
Knowing my own track record, I wasn’t about to remove my Outback’s headliner myself. Instead, I took the car to Cascade Rack Systems in Bend, Oregon, and they did an outstanding job installing the NashFab rack.
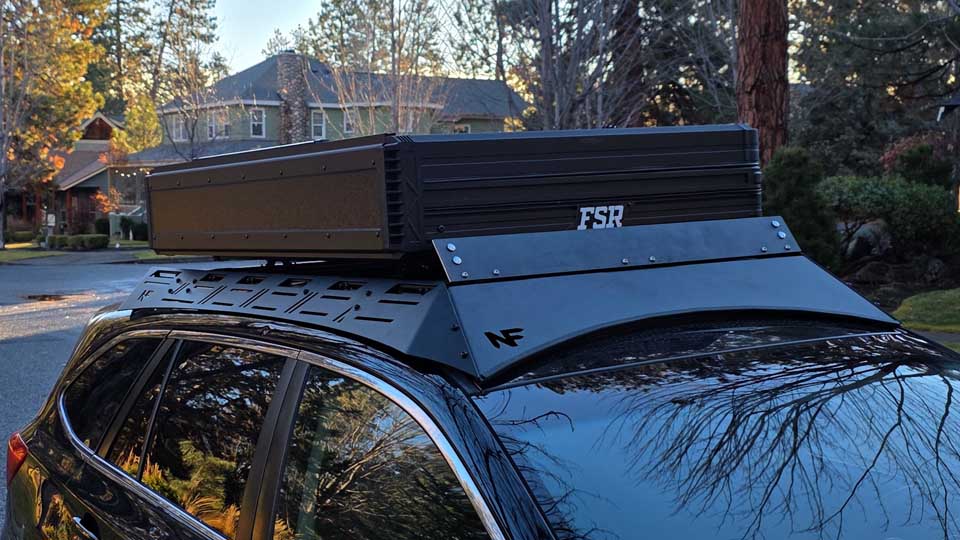
Since the NashFab doesn’t require drilling into the roof, installation is similar to the Sherpa in that regard. They also installed one-inch Prinsu rooftop tent mounts.That put my tent roughly 3.25 inches above the roof. Compared to the 5.5-inch height of the Anderson Designs setup, the improvement in handling was dramatic.
Go Out Of Your Way To Mount It As Low As You Can
Vs.
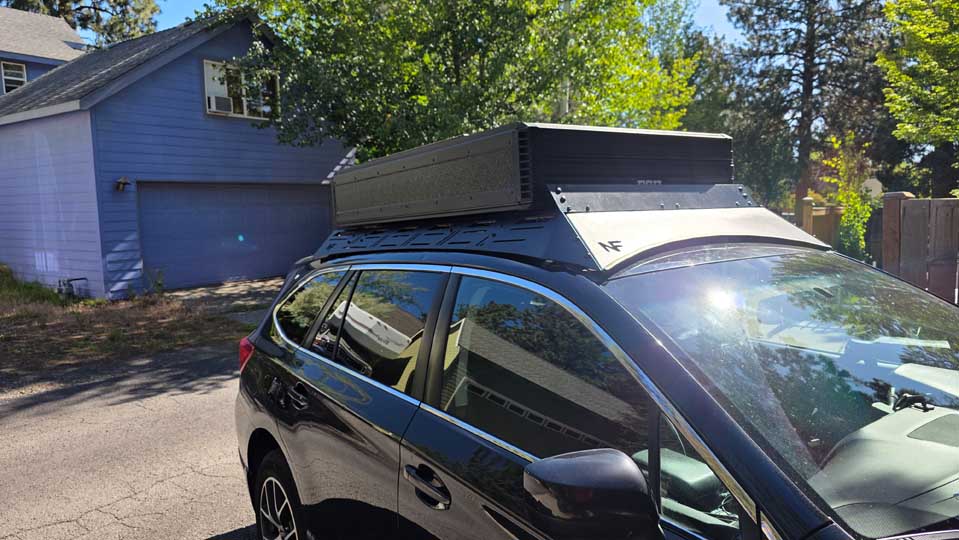
Of course, I still wasn’t done and wanted to ditch the 1″ RTT mount.
One limitation of the NashFab rack is that you can’t simply lower a rooftop tent with pre-mounted crossbars onto the rack the way you can with the Prinsu or Sherpa. The design that makes it stronger also makes installation more complicated. I wanted to get the tent even lower, down to around 2.25 inches above the roof.
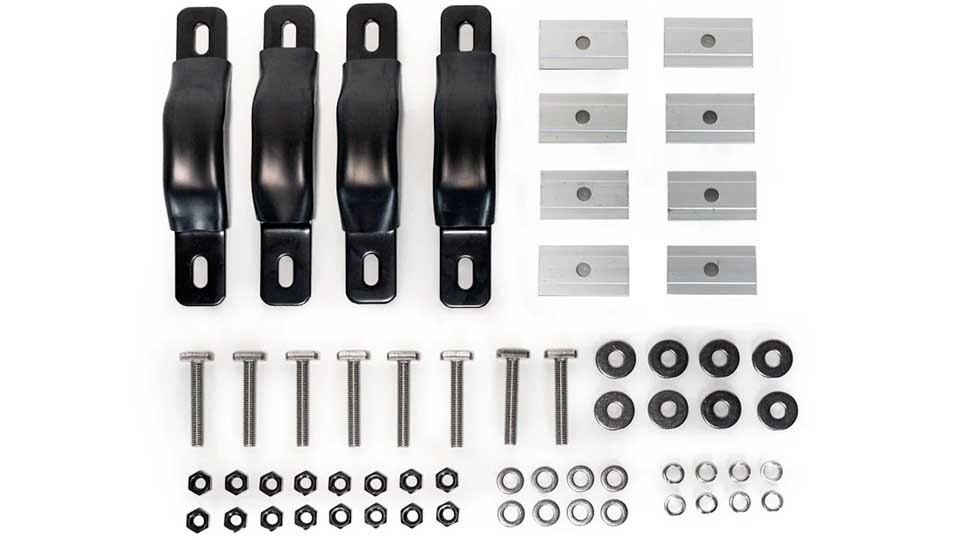
To do that, I bought two additional sets of factory Free Spirit Recreation mounting brackets. I wanted enough hardware to mount the tent across four crossbars instead of the normal two.
Direct Mounting Your Rooftop Tent
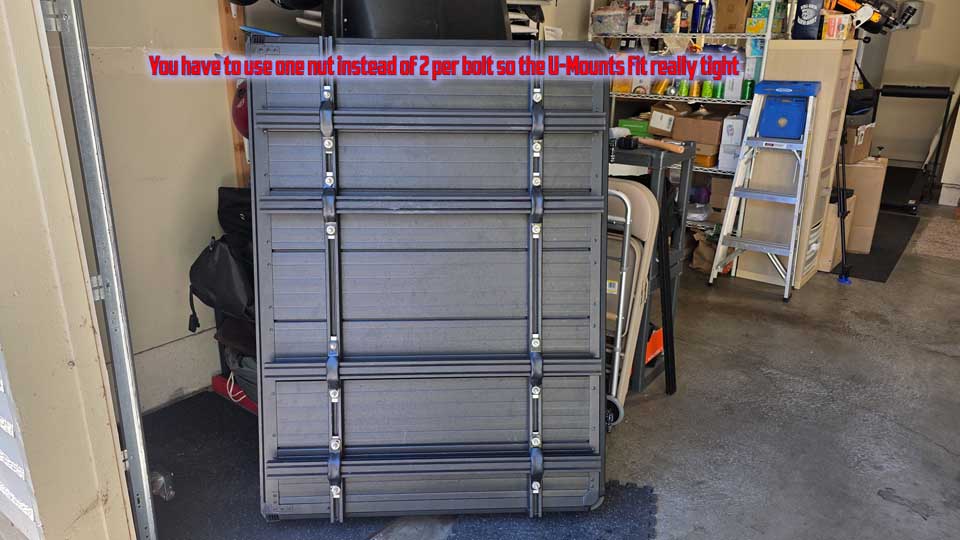
I also wanted spare hardware because the factory bolts bend easily, and once they bend, they often break when you try to remove them. After removing the NashFab crossbars, I carefully positioned all four bars exactly where I wanted them.
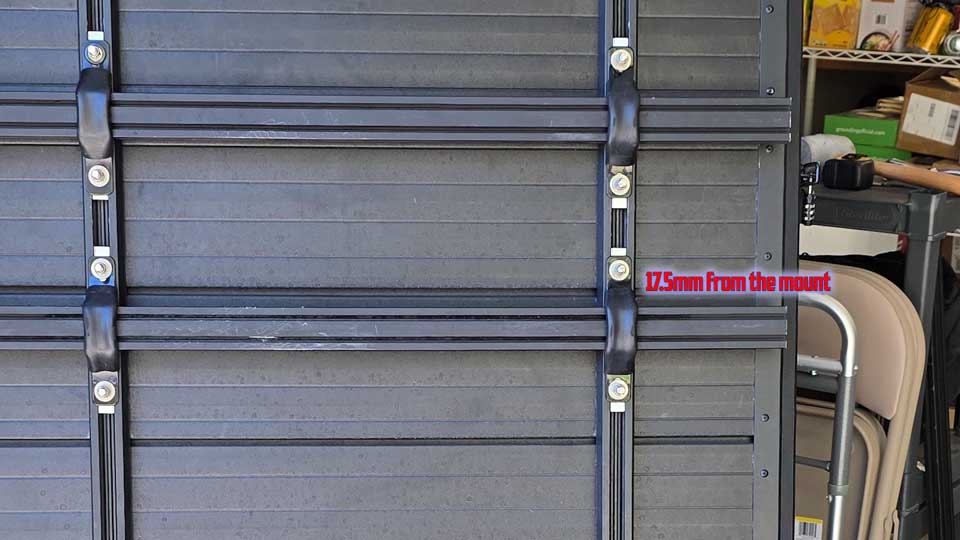
For anyone attempting the same setup, I found the crossbars worked best with approximately 17.5 mm extending past each side of the mount. Because everything sits so close to the roof, I also had to shorten every bolt with a hacksaw.
Otherwise, the bolts would have contacted—or potentially damaged—the roof itself.
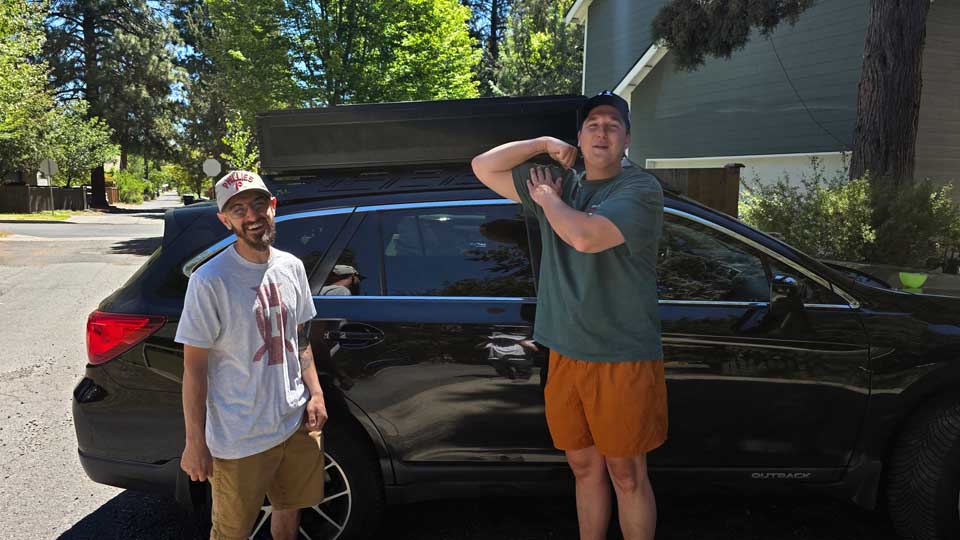
With help from Davey and Joe, we carefully lifted the tent, spread the side rails slightly, and lowered it into place. Thankfully, everything worked exactly as planned.
Would I do it again?
If I were doing the project over again, though, I’d probably choose either the Prinsu or Sherpa. Even though they sit slightly higher, they’re much easier to work with, and they’re fully compatible with the best aftermarket wind fairings. If NashFab made a Rooftop Tent wind fairing, I’d be 100% happy.
Positioning the Tent on Your Vehicle
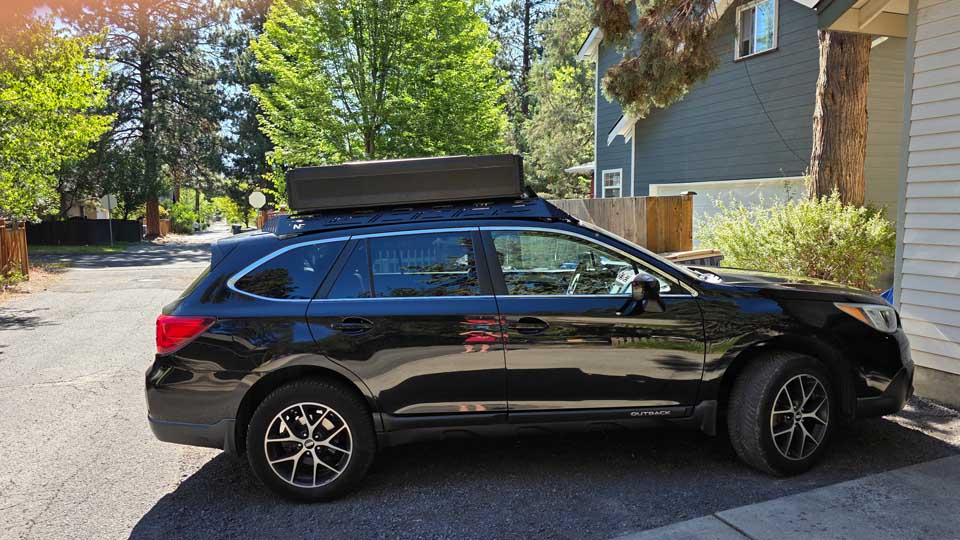
One thing that’s really important when mounting your rooftop tent is getting the position right.
Try to center the weight between the front and rear wheels as much as possible. You’re always going to end up a little farther back because of the size of the tent, but don’t assume pushing it all the way to the rear is the best solution.
I actually tried mounting mine as far back as possible because I had rear overload springs and thought that would balance everything out. It didn’t.
Moving the tent farther forward dramatically improved how the car handled. The steering felt more balanced, cornering improved, and the overall driving experience was much better.
If you mount the tent too far back, it unloads the front suspension, which really affects handling on curvy roads. If you drive an AWD vehicle, it also puts more stress on the rear of the drivetrain.
The people at Cascade Rack Systems showed me the ideal mounting position, and when I remounted the tent later, I followed their recommendation exactly.
Reducing Wind Noise
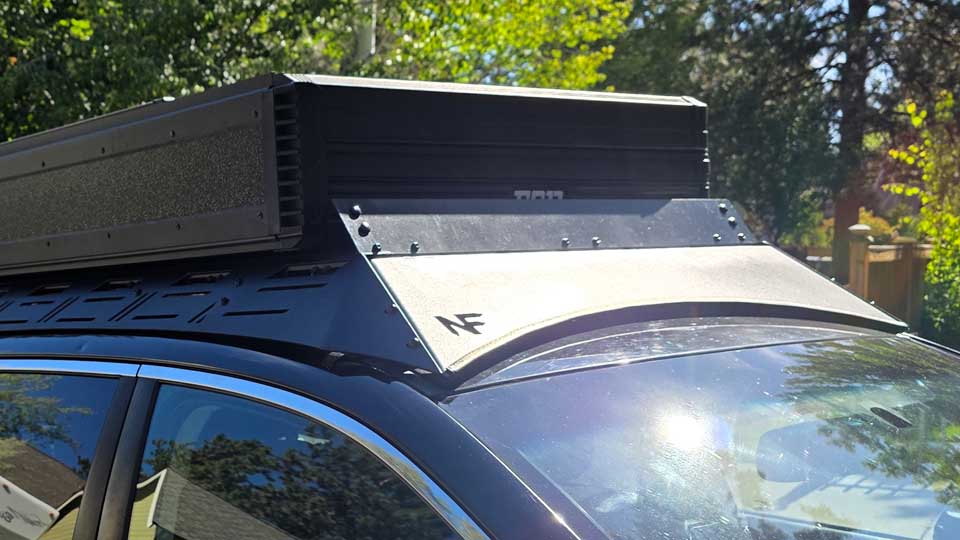
Even with a low-profile roof rack, wind noise is something you’ll want to address. The first thing I recommend is a proper wind fairing like the ones from JC Offroad or Victory 4×4 if your rack supports them. They do an excellent job of blocking the air flowing underneath the tent.
If you have a tent like my Free Spirit Recreation Nova, there’s another inexpensive upgrade that made a noticeable difference. The tent has channels built into the shell, and I installed Intrepid Gear Aero Strips into those channels. I considered Intrepid for a Tent brand, but their 2-person tent was very long and heavy, so I chose to just use their strips.
These eliminate the whistling sound created by the open channels while driving. They’re inexpensive, easy to install, and they look like they came from the factory once they’re in place. For around forty dollars, I thought they were well worth buying.
Bedding Recommendations
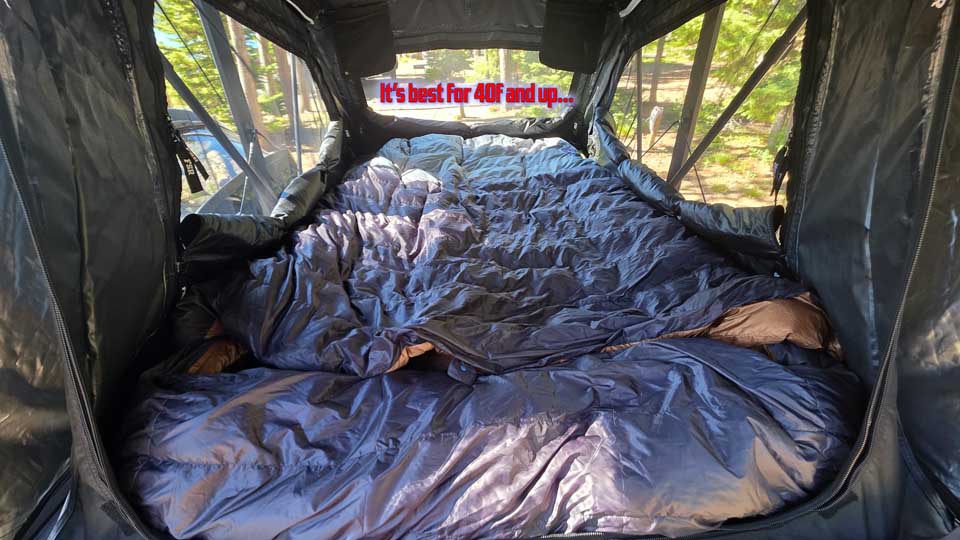
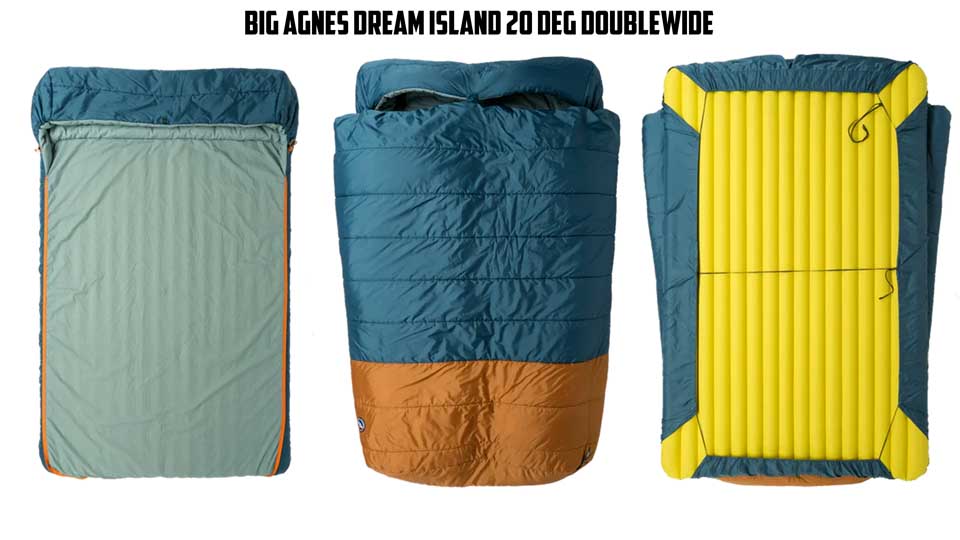
One of my biggest goals was creating a setup that stayed inside the tent permanently. I didn’t want to unpack blankets or sleeping bags every time I went camping. For that reason, I bought the Big Agnes King Solomon Double Wide 20° Sleeping Bag.
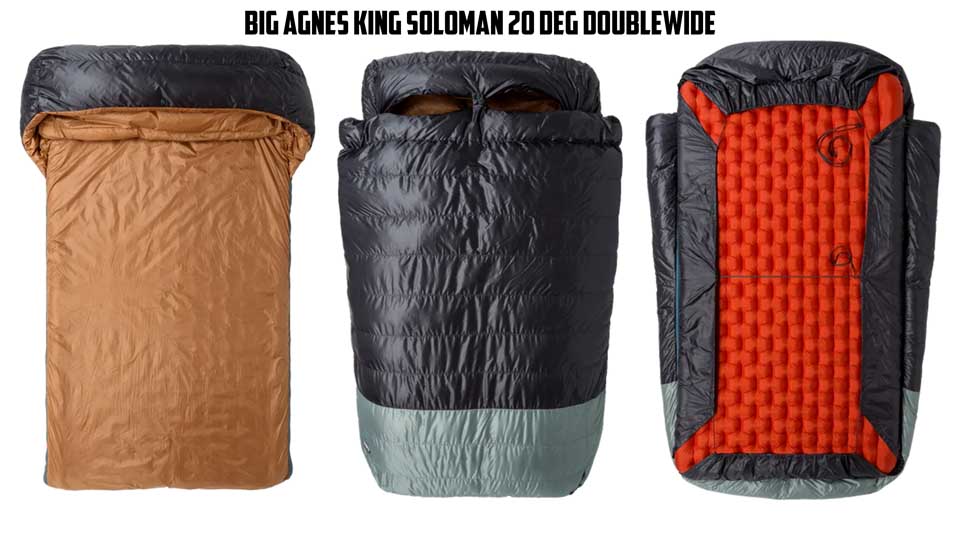
The reason I chose Big Agnes is because of its design. It has a fitted sheet on the bottom that attaches directly to the mattress, while the insulated top zips completely on or off. That means I can use it as a sleeping bag during colder weather or simply unzip the top and use it as a blanket when it’s warmer.
When it’s time to pack up camp, I simply zip everything together and fold the tent closed. The bed is already made the next time I open it. For my 45-inch-wide mattress, the King Solomon fit perfectly.
If you have a wider tent, Big Agnes also makes larger double sleeping bags like the Dream Island.
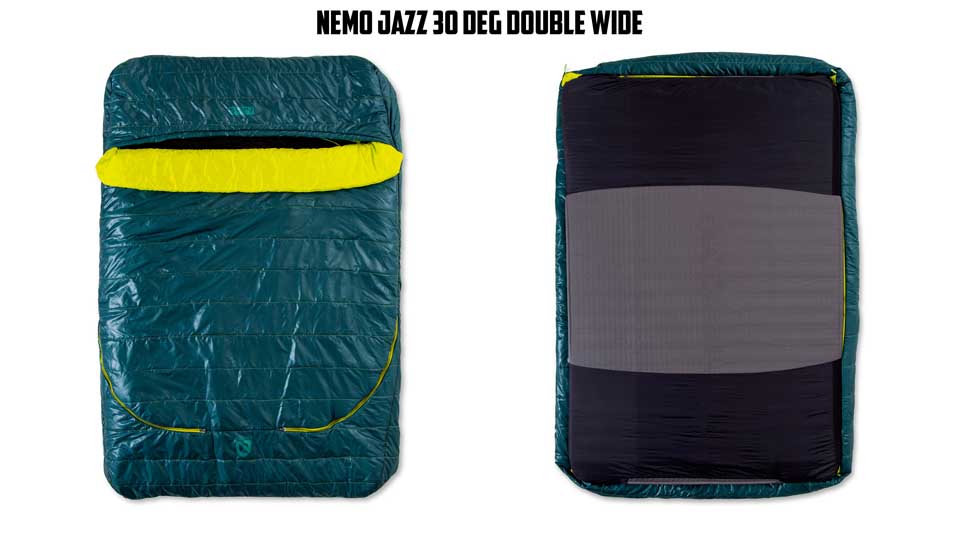
Another good option is the Nemo Jazz, although the top doesn’t detach completely the way it does with the Big Agnes.
I also found I could fit both the Free Spirit Recreation Cloud Topper and an additional 1.5-inch memory foam mattress pad inside the tent while still allowing it to close.
It’s a tight fit, but it works, and it makes the mattress dramatically more comfortable.
Leveling Your Vehicle
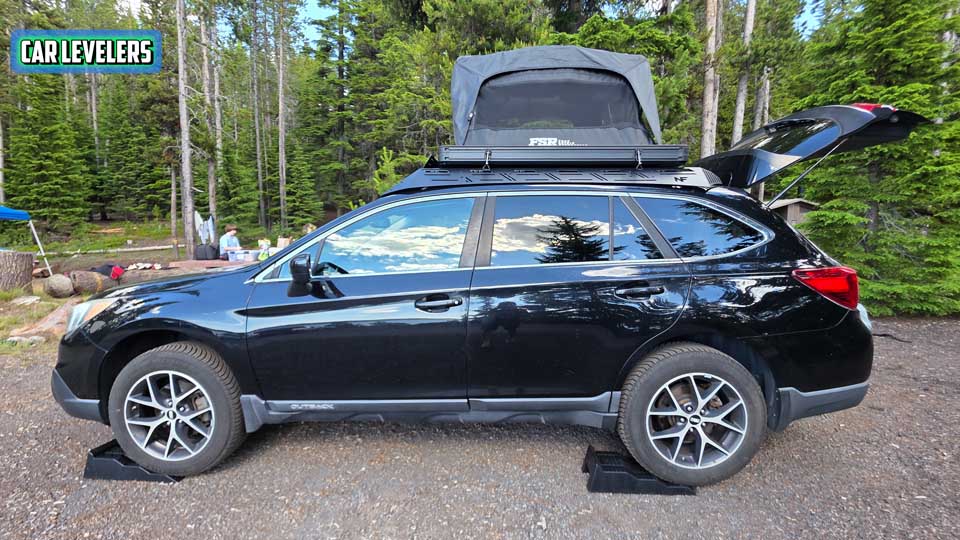
Another inexpensive item I’d highly recommend is a set of vehicle leveling ramps. I used Thule levelers that sit underneath the tires, along with a simple bubble-level app on my phone.
Buy These Thule Car Levelers From Backcountry
Getting the vehicle level makes a huge difference in sleeping comfort.

It’s one of those small purchases that you’ll appreciate every single camping trip.
Additional Vehicle Maintenance
Once you permanently mount a rooftop tent, it’s worth being a little more proactive with maintenance. Even with my tent mounted very low, it’s still additional weight that your vehicle carries all the time. Because of that, I now change my oil earlier than I normally would. Instead of waiting around 5,000 miles, I usually change it somewhere between 3,500 and 4,000 miles.
I’m also a little more diligent about changing fluids and generally keeping up with maintenance. The higher your rooftop tent sits above the roof, the harder your suspension and drivetrain have to work. Planning for slightly increased maintenance is just part of owning a rooftop tent.
Final Thoughts
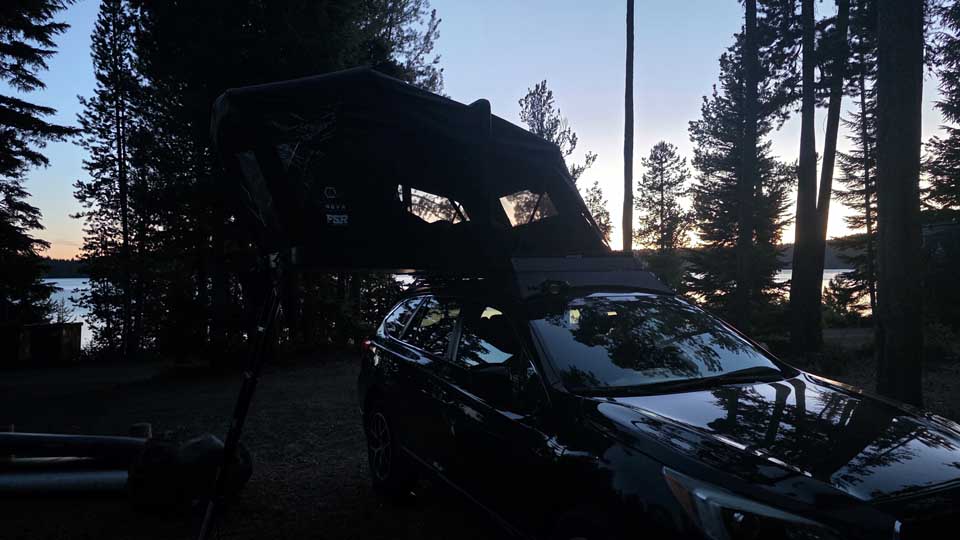
So to sum up this Small Car Rooftop Tents Buying Guide, if you’ve made it this far, you’ve probably realized this whole process is a bit of a pain. Getting a rooftop tent dialed in on a small to midsize vehicle takes time, research, and a fair amount of money. Even if you avoid every mistake I made, it’s still an expensive project.
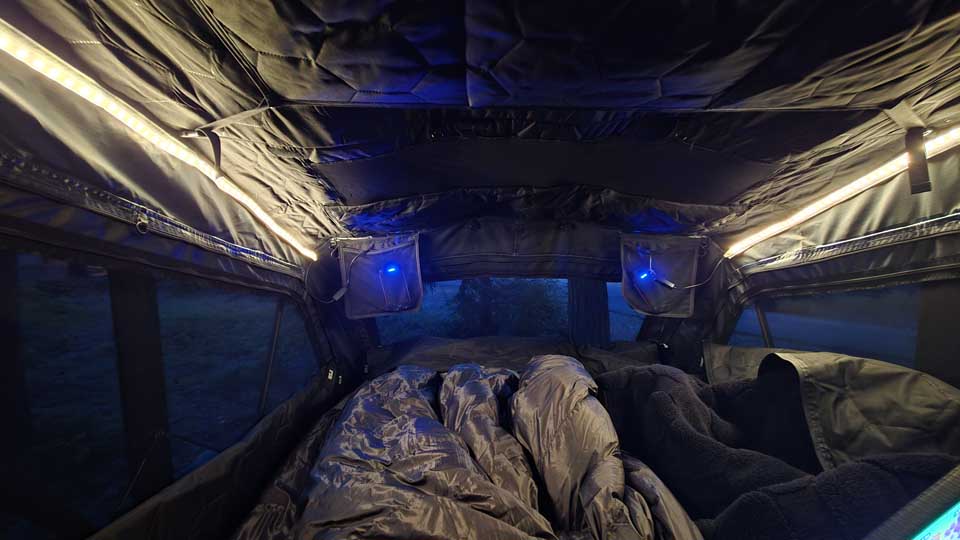
But hopefully sharing everything I learned saves you some time, frustration, and money along the way. For my 2015 Subaru Outback, getting everything working the way I wanted became a complete project.
Was It Worth It?
Am I glad I did it? Absolutely. I love projects like this. I enjoy geeking out over the details and tweaking everything until it works exactly the way I want it to. That said, I also realize this isn’t for everyone.
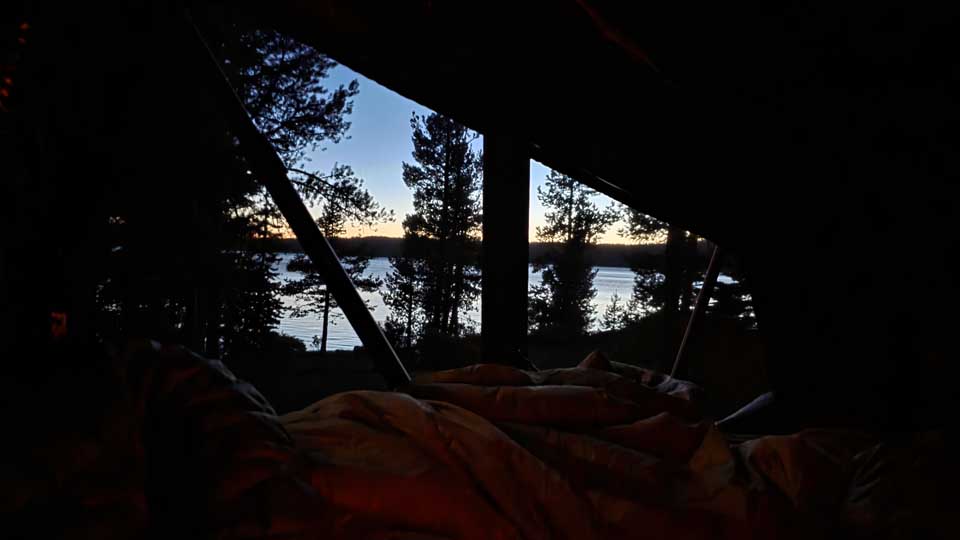
Now that it’s finished, I have a rooftop tent that’s warm, comfortable, quiet, and incredibly easy to use. I can sleep better than I ever did in a ground tent. There’s far less sand and dirt getting inside, and having the sleeping setup permanently ready means I’m much more likely to head out camping on short notice.
Ultimately, the goal of this guide wasn’t to convince you to buy a rooftop tent—or to talk you out of one. It was simply to show you the entire process, explain the mistakes I made, and help you understand what it takes to make a rooftop tent work well on a small to midsize vehicle. If you decide it’s right for you, hopefully you’ll know exactly what you’re getting into before spending your money.
A Rooftop Tent Buying Guide Specs
A Rooftop Tent Buying Guide Images
We try to get as many images of the A Rooftop Tent Buying Guide, but forgive us if they're not all there.
2026
A Rooftop Tent Buying Guide User Reviews
Where To Buy
No obligation, but these links support the site.
No Results Found
No Results Found
Where To Buy
No obligation, but these links support the site.